Norm's Cave Astrola Story
A Cave restoration from an Estate find.
By Norman Tajudin
On a moment's notice, I joined a friend to attend an estate sale in Newport Beach, California. There was a telescope listed for sale for $500 in the advertisement. My thoughts were that if it was halfway decent, I could flip it on Astromart and not think twice.
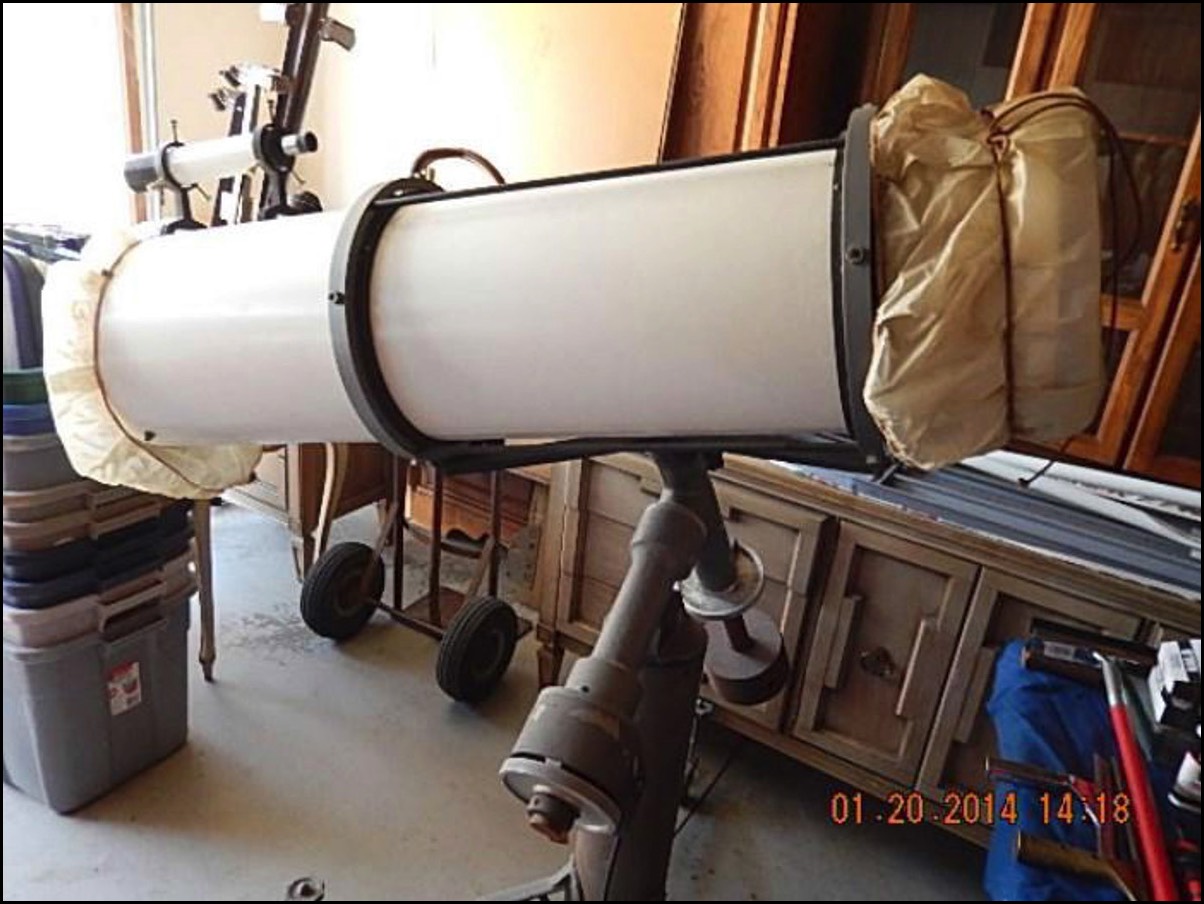
Upon arriving at the estate sale and inspecting the telescope however, I thought that it was a tired, rusted out piece of junk. It had a brand name called “Cave Astrola” that quite frankly, I had never heard of. Nevertheless, I decided to search “Cave Astrola” on my phone and that's when I came across the Cave-astrola.com website. After reading a bit I realized I might have a gem on my hands. After negotiating with the estate sale folks, I walked out with a 1976 Cave Astrola 10" f/5 telescope and mount for just $300!
When I brought the package home, I started the process of reading through the website and searching for reviews on the optics. I also cleaned the mirrors to check it out while I considered my options of flipping it or keeping and restoring it. Fortunately, that night, there was no moon and Jupiter was in the sky. Upon properly adjusting the secondary and collimating the optics, I took a glance at Jupiter. The telescope showed a clear delineation of Jupiter's bands and a wonderful view of the great red spot. The view rivaled my much more expensive Astrograph. That is when I was hooked. My path was clear. I was going to restore the Cave Astrola and keep it for myself!
My first step was to research the different restoration efforts on the Cave Astrola site and the CloudyNights (CN) site under “Classic Telescopes”. I also started a restoration thread on CN to not only document my restoration but also to get guidance from experts like Tom Terleski, Jon Miles, Steve Gorton, Tim Parker, and many others. All of my prior astronomy equipment is 2005 and newer so I was in the dark with restoring a classic telescope like this. I didn't want to waste time going down dead-end paths or doing irreversible damage so I knew their guidance during my restoration was invaluable.
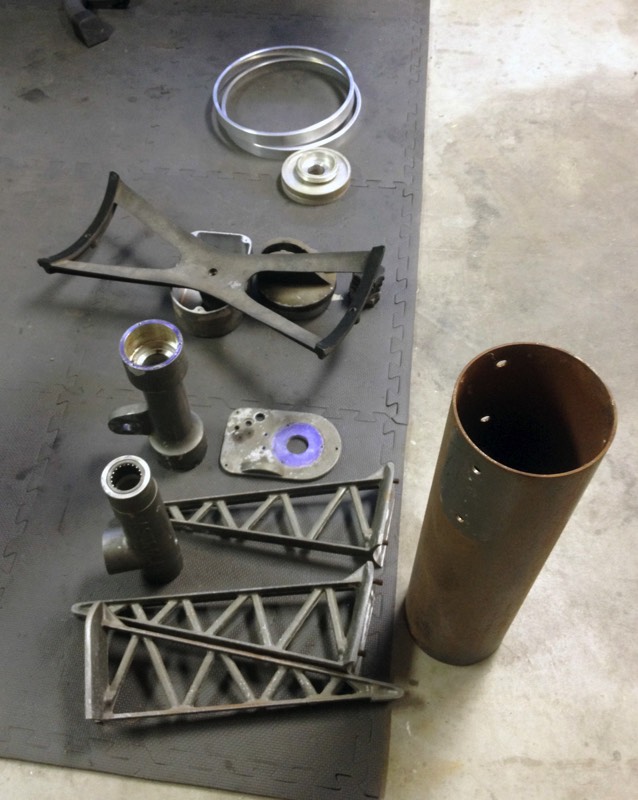
Teardown
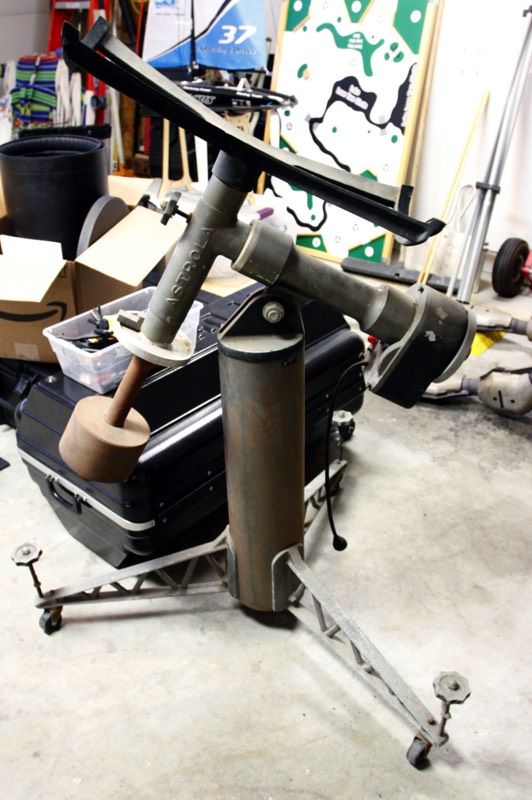
The teardown process in and of itself was challenging considering the years of rust that had accumulated on the mount. Also, all of the original grease had hardened into an epoxy like substance! Many describe this as a “varnish” that many of the old Chinese mounts suffered from.
Declination Axis
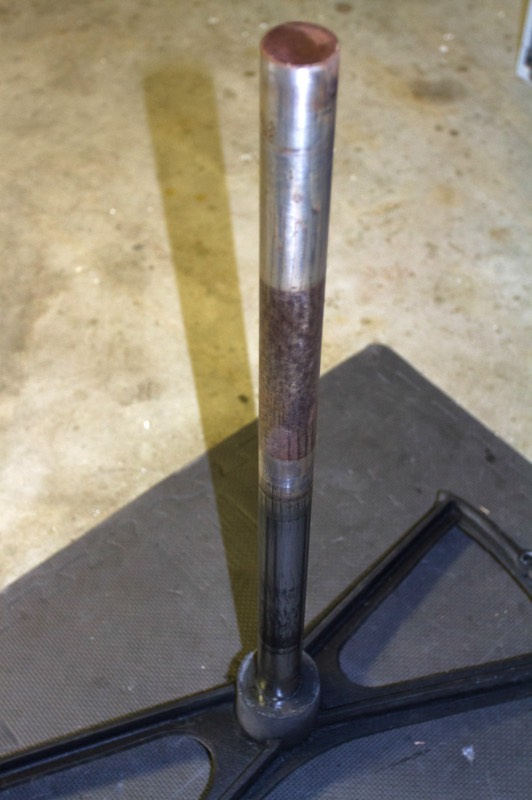
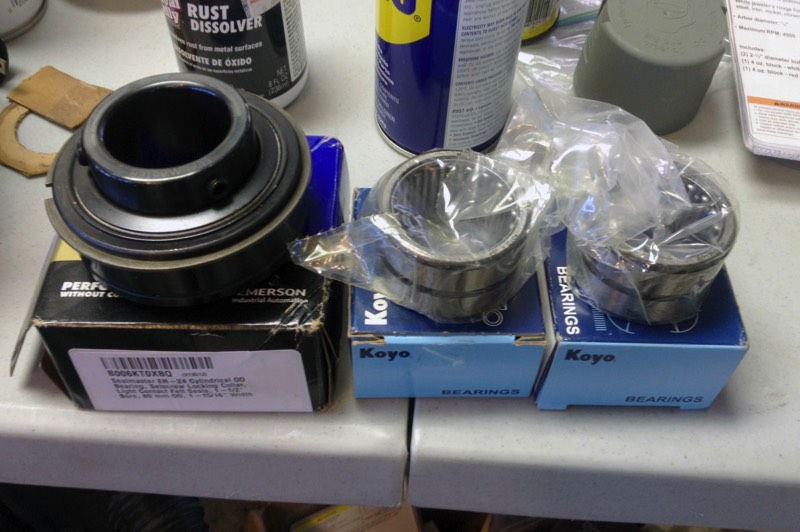
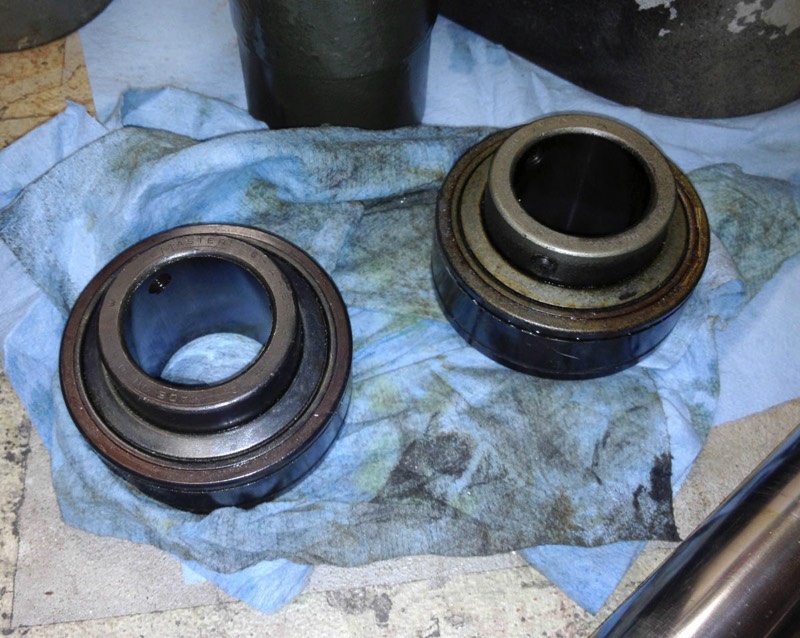
I started with the declination shaft. I used a lot of liquid wrench, lots of colorful comments and eventually lots of patience to free the locking collars, counterweight, and setting circle. Once this was done, the rest of the declination, including the OTA saddle was easily removed. I used heat and a slide hammer to remove the declination axis bearings. Unfortunately, I may have used a little too much effort in removing the bearings and I had to replace both bearings. The original were Torrington branded bearings. Fortunately I found a match on Amazon that were made by Koyo (Koyo HJ-243320 Needle Roller Bearing).
Right Ascension Axis
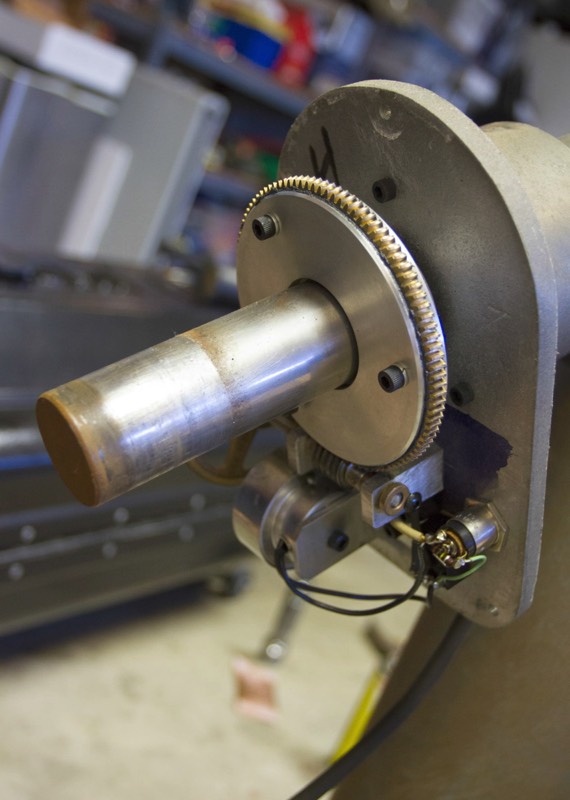
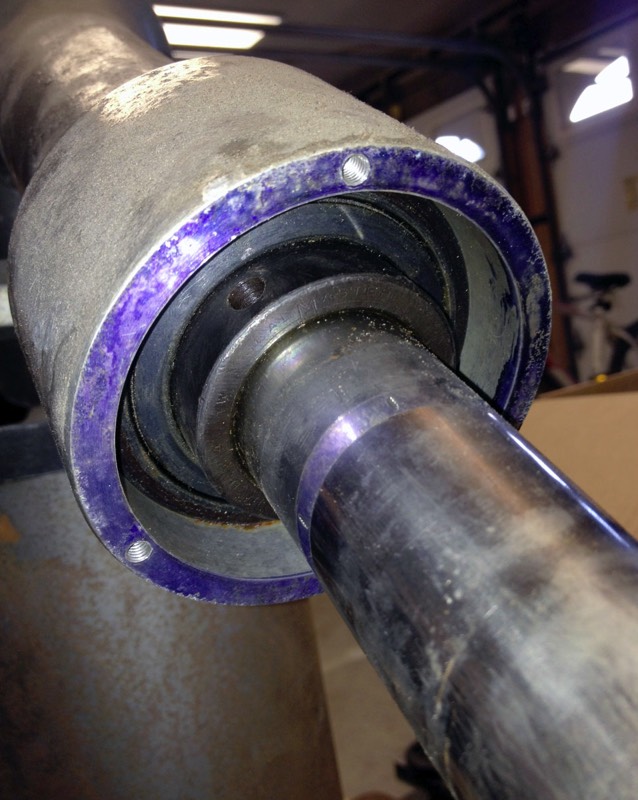
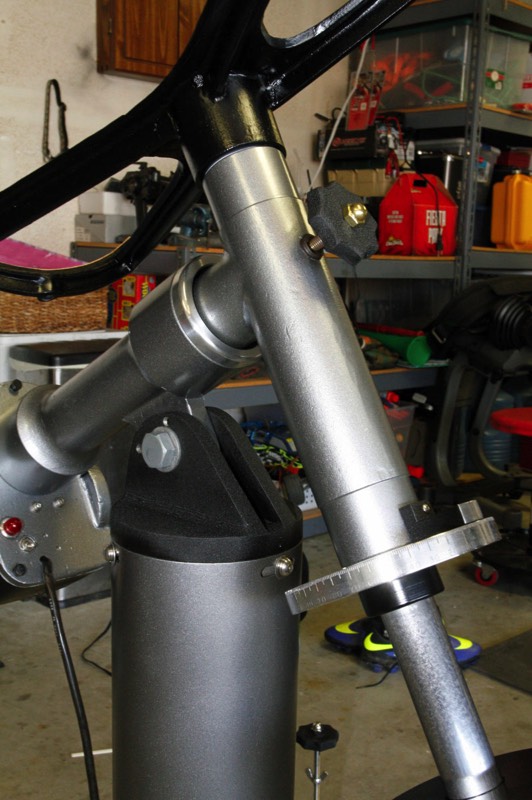
Next, I started the dismantling process for the RA axis. Once again, liquid wrench and heat played a key role in facilitating the removal of the locking collars and setting circle. Once removed, I was able to take apart the drive assembly (motor, worm gears, mount plate, etc.). Next, I used a rubber mallet to "ease" the aluminum trim ring, allowing access to the upper bearing setscrews. I used Jon's tip in creating a modified Allen wrench to loosen both Sealmaster ER-24 bearing setscrews (two on each side). Despite loosening the setscrews, the RA axis was stuck. That's where my 5 lb. dead blow hammer came in handy! One of the original bearings were rough and needed replacement. This particular bearing was not a Sealmaster, so I procured an actual Sealmaster bearing from Amazon to match the other original bearing. The bearings are very large and are rated at several thousands RPM, but of course, only need to turn one revolution per day!
Pier and OTA
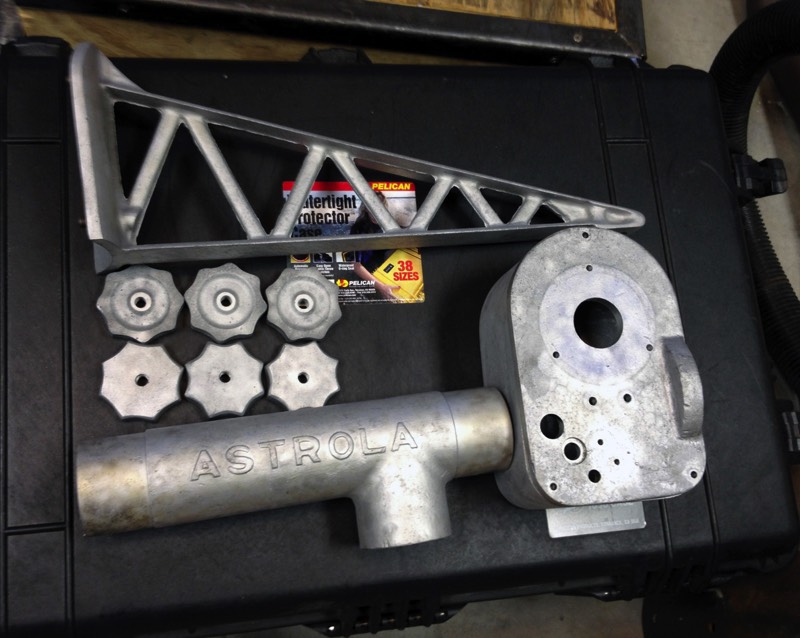
Once the RA axis was dismantled, I could focus on the pier and OTA. Both were straightforward. With the OTA, the aluminum trim rings on my version were pressed on so it only required a little elbow grease to slide them off without damaging the OTA and trim rings.
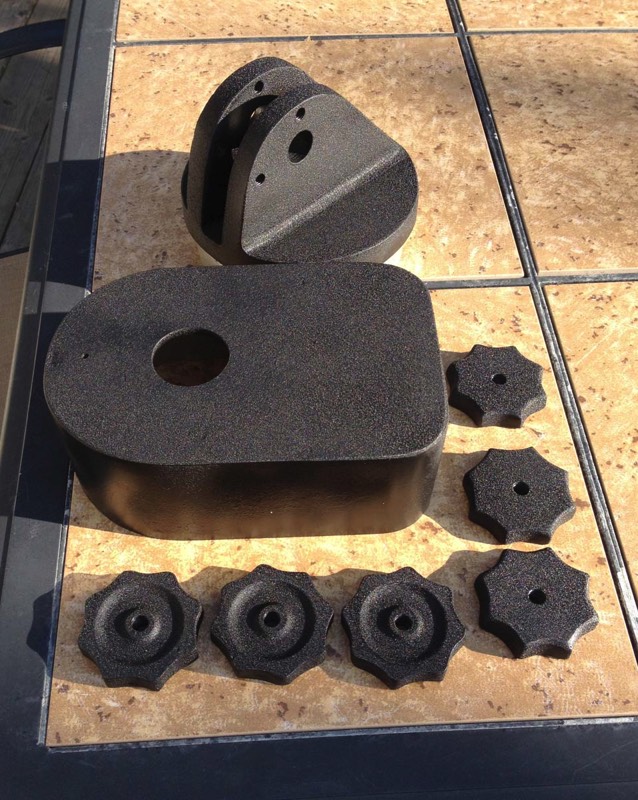
Painted Parts
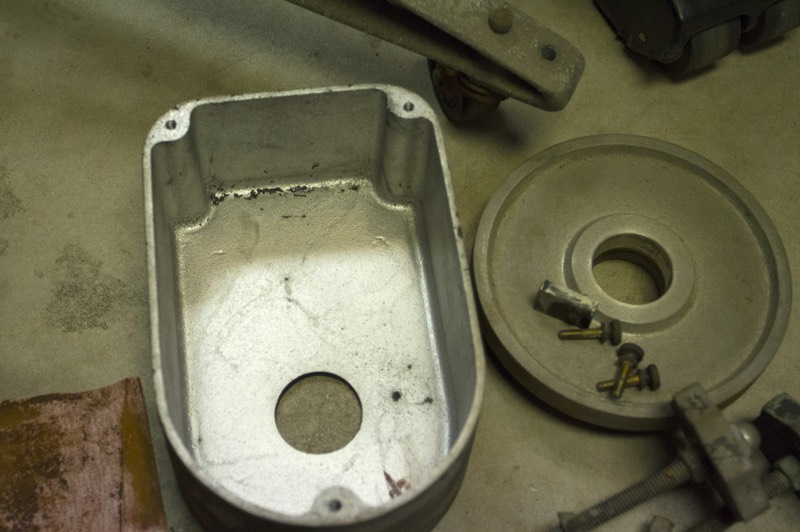
Not wanting to use a ton of paint stripper and sand paper, I picked up a "blasting booth" from Harbor Freight to bead blast the painted parts. That was well worth the $100 price as it made easy work of the paint stripping process. Once stripped, I primed all of the parts with etching primer and then, as closely as possible, matched the original colors of the mount and saddle. I didn't clean up the original parts as I wanted my mount to look like it did when it came out of the factory, rough castings and filing marks and all.
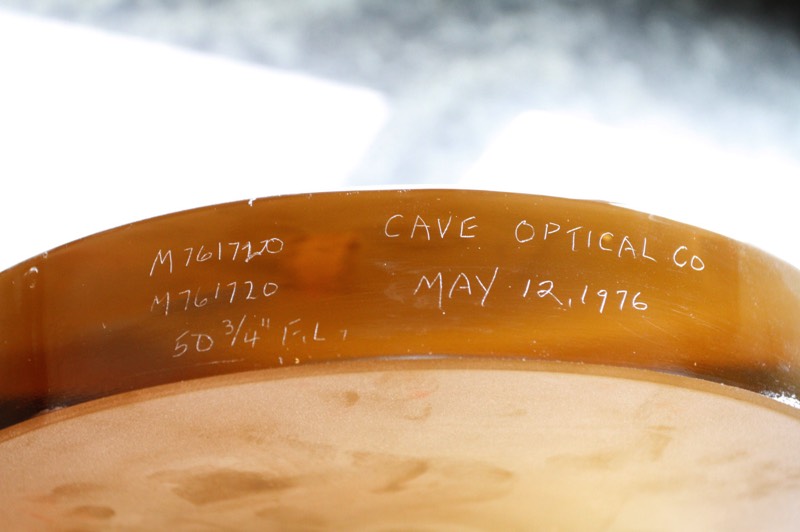
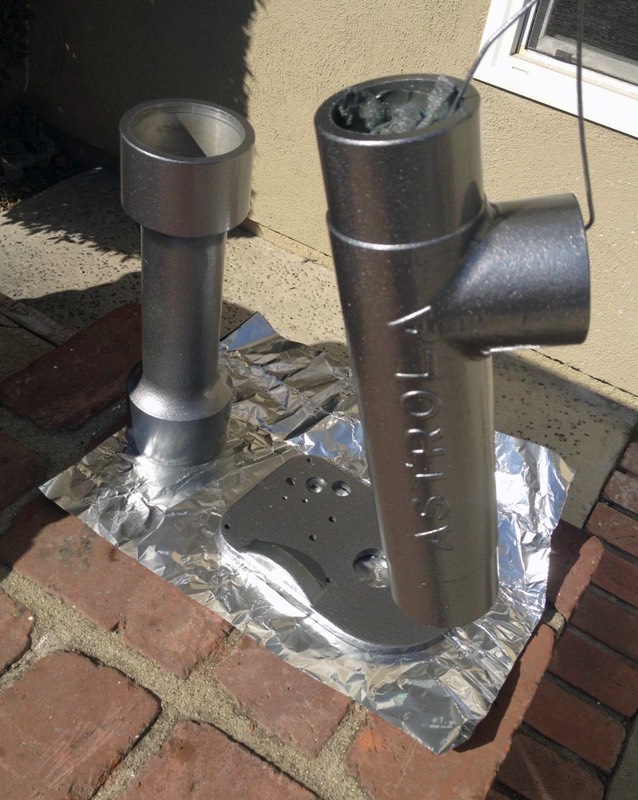
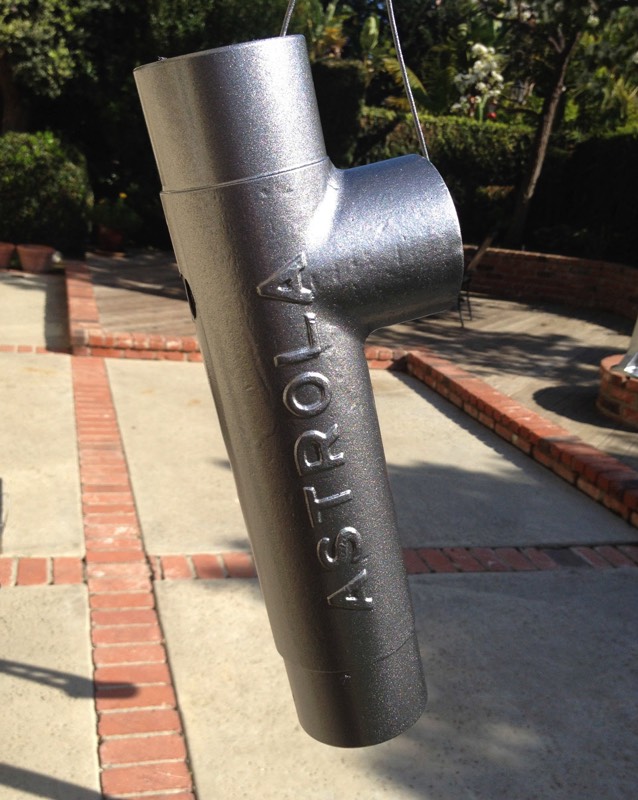
OTA
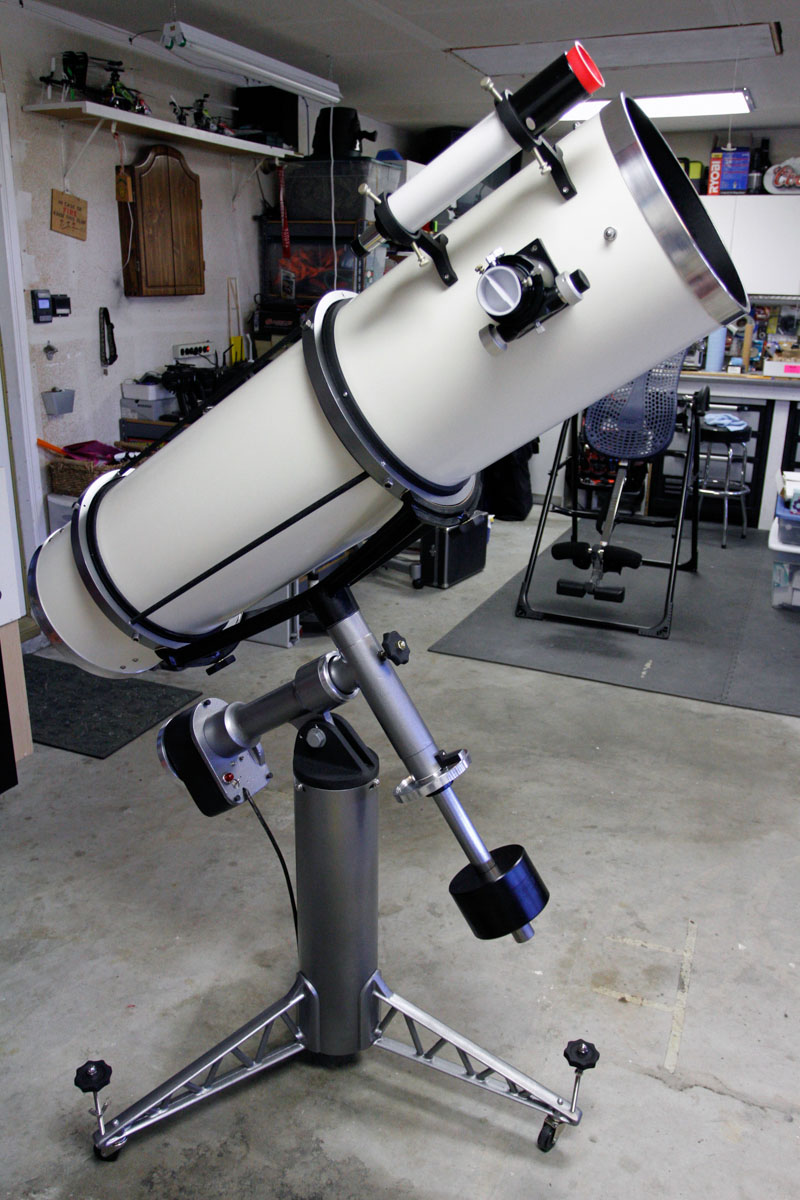
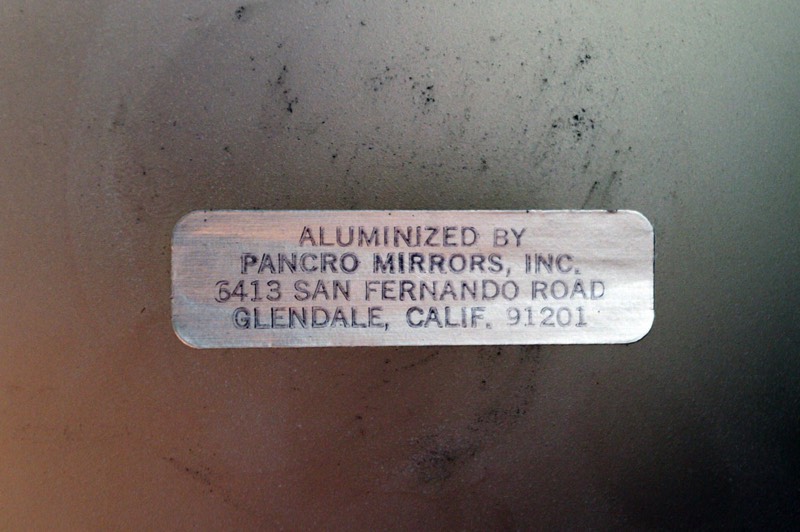
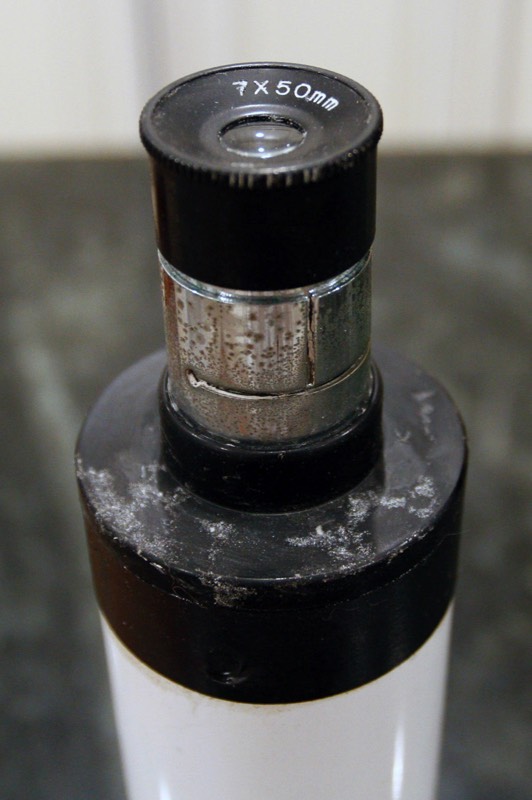
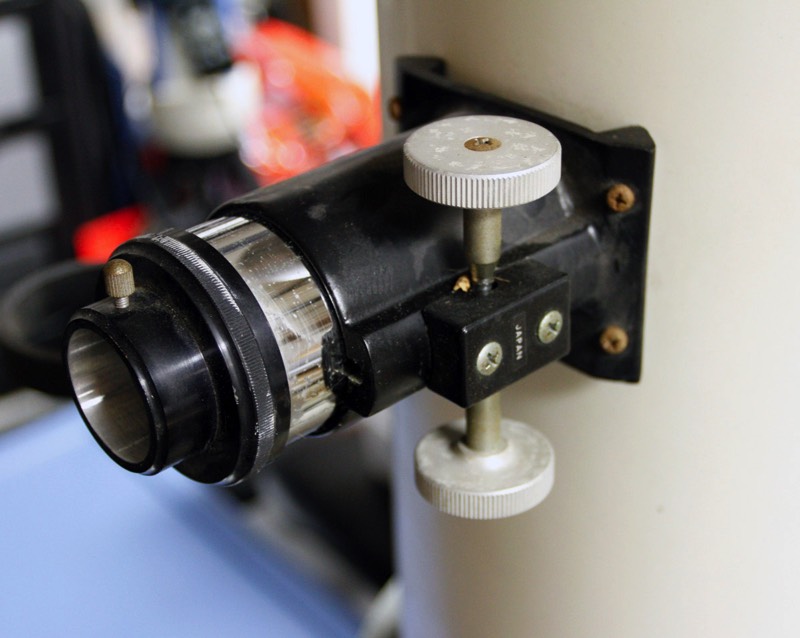
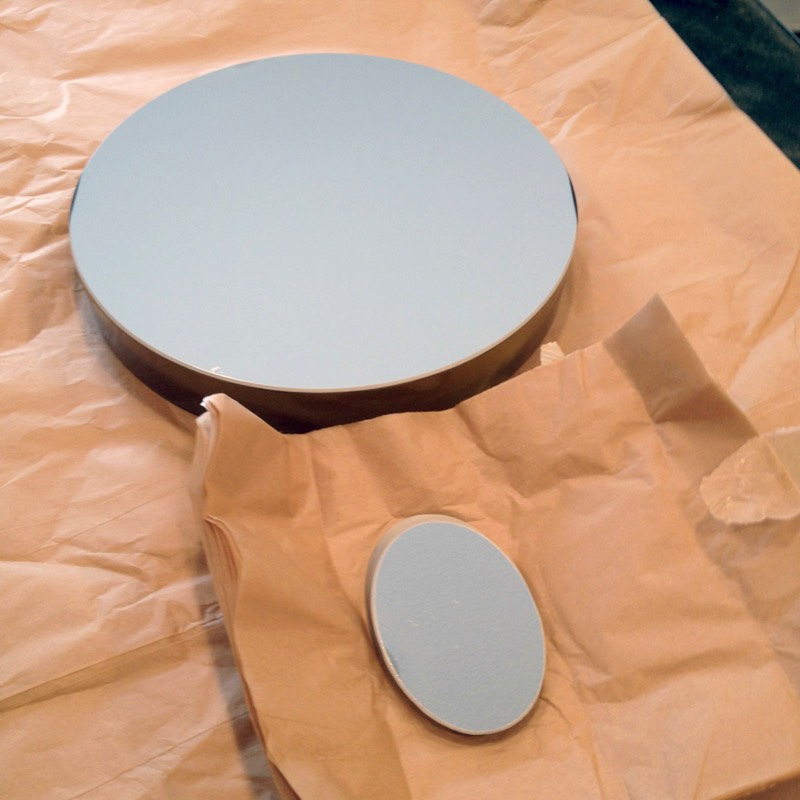
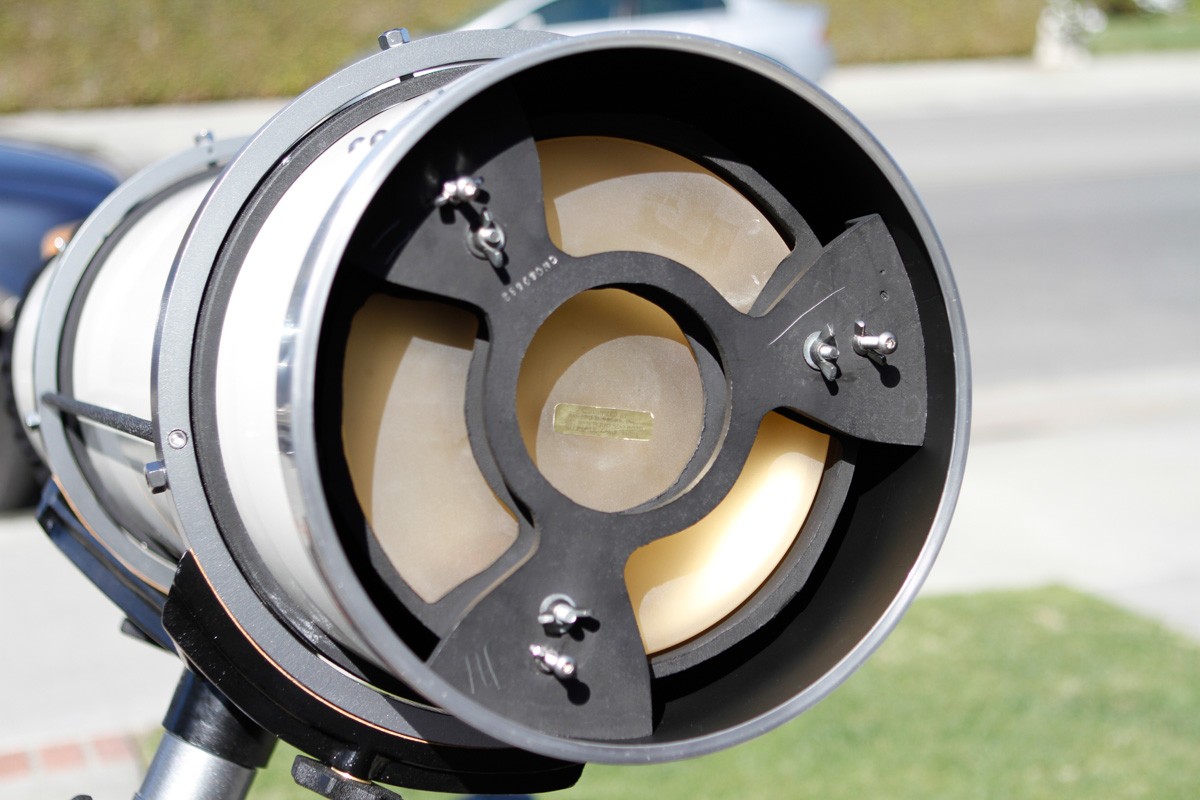
With the OTA, I sanded the interior and painted it flat black. I fine sanded, polished, and waxed the exterior of the OTA to remove scratches and marks received in the prior owner's garage. While working on the OTA, I sent off the mirrors to L&L Optical in Santa Ana, California to be aluminized. The only modification I made to the OTA was the addition of a GSO Linear Bearing 2-spead focuser that would accept my 2" eyepieces and photography equipment. Fortunately, my OTA had two primary mount positions, allowing me to mount my mirror closer to the secondary to facilitate focusing with both my eyepieces and photography equipment.
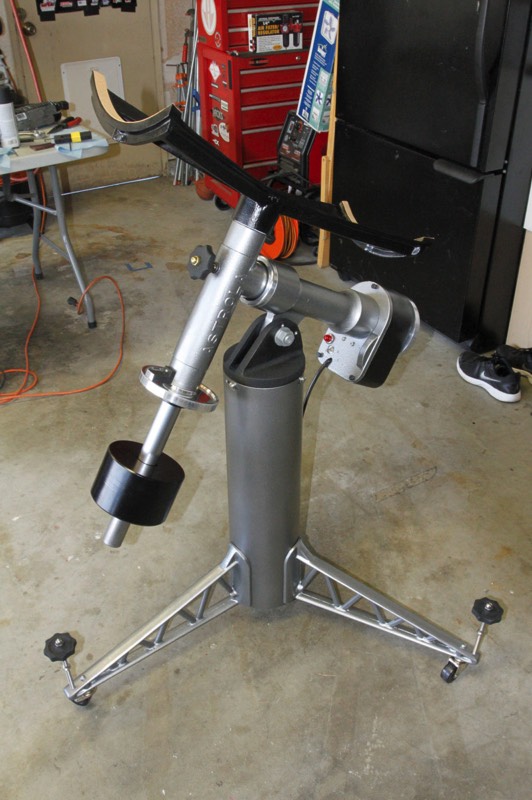
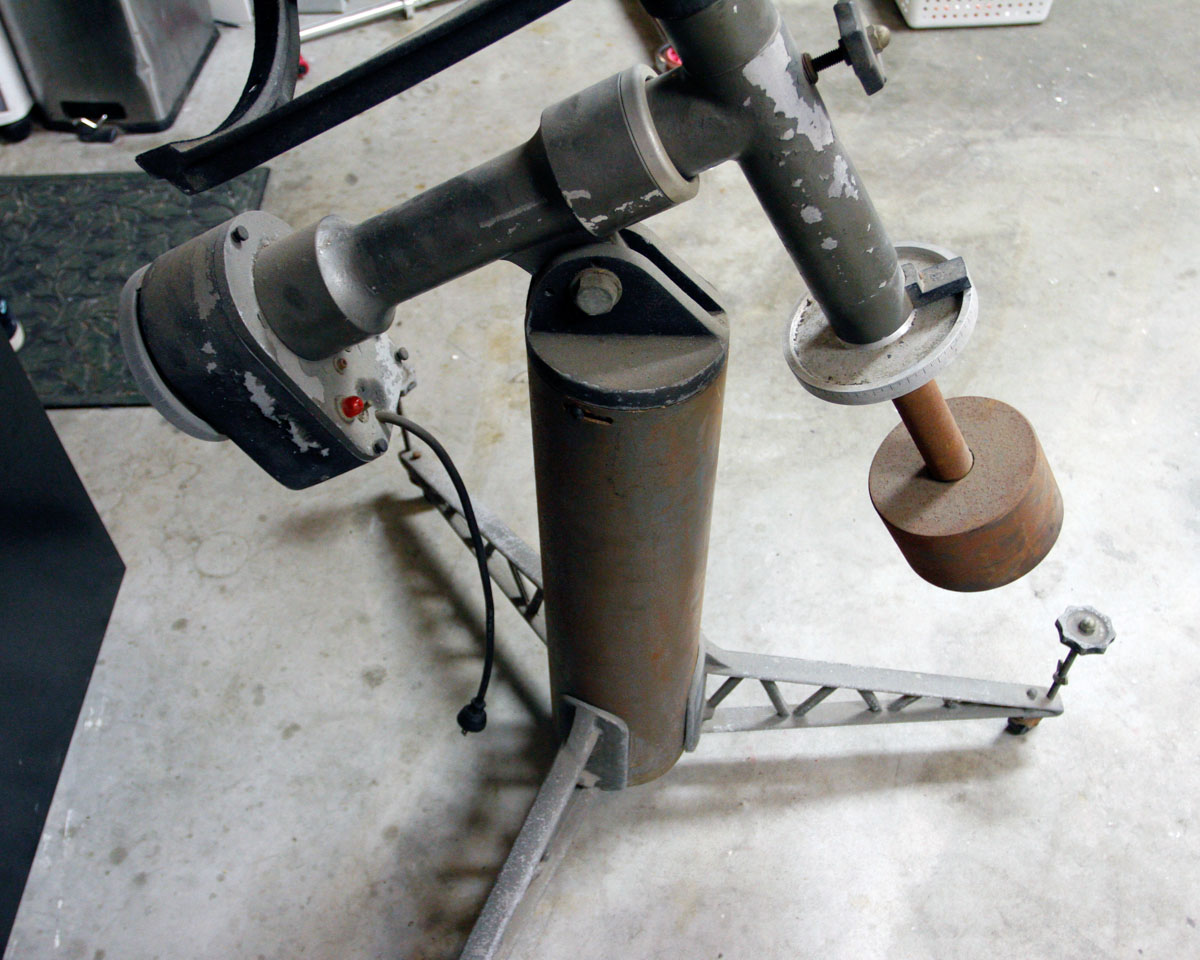
Axes and Counterweight
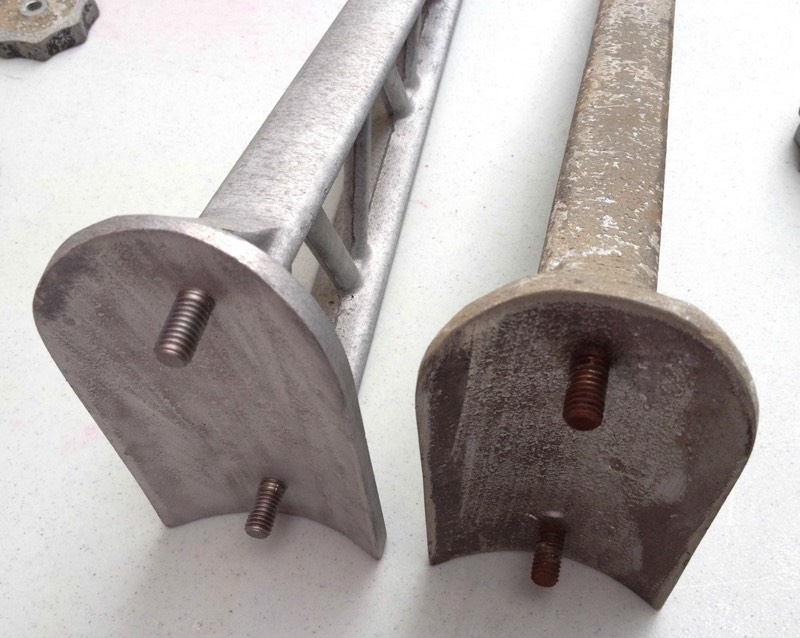
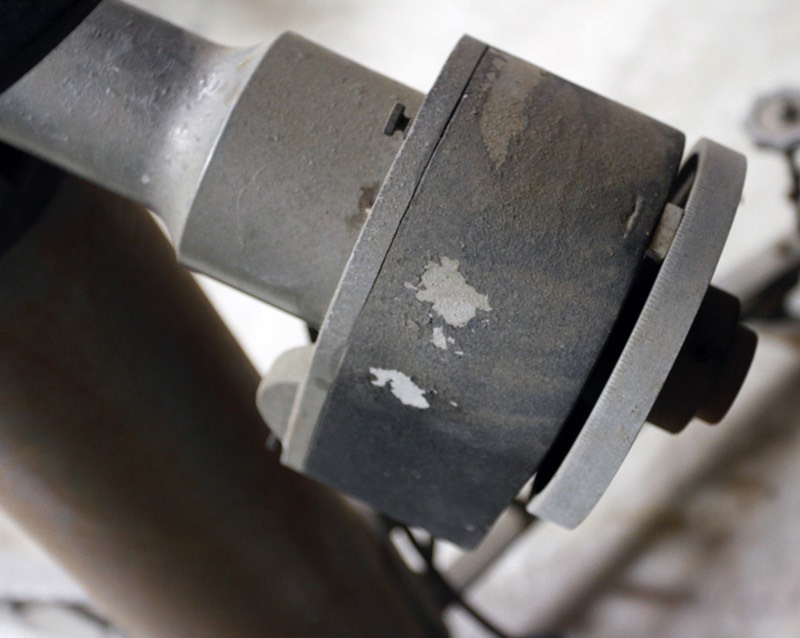
Both axes were heavily rusted. Between Naval Jelly and a ton of varying grits of sand paper, I was able to bring back the “like stainless” shine buried underneath the rust. It's not perfect but it looks much better than before! I bead blasted the counterweight, primed it with etching primer, and painted it with satin black paint. I did the same for the locking collars.
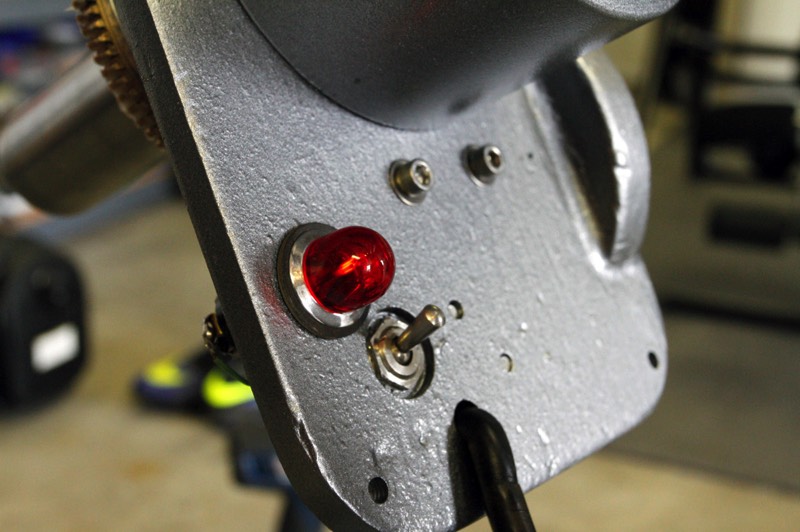
Clock Drive
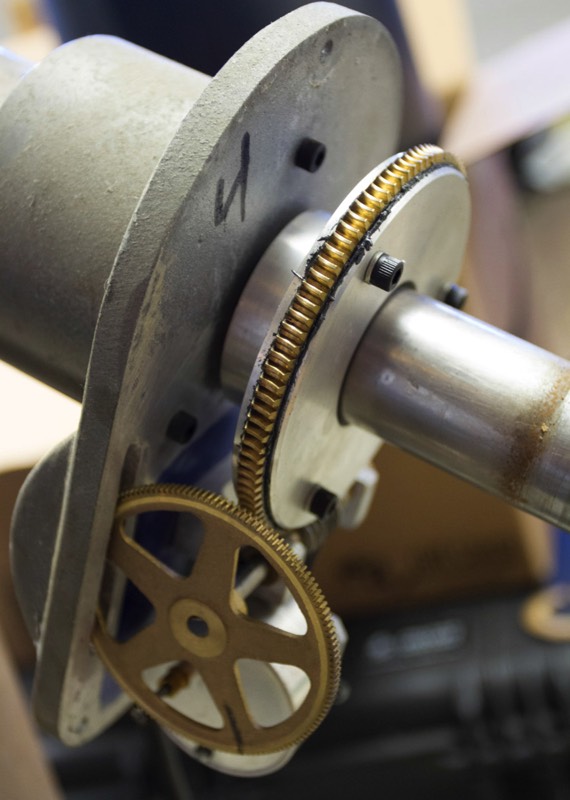
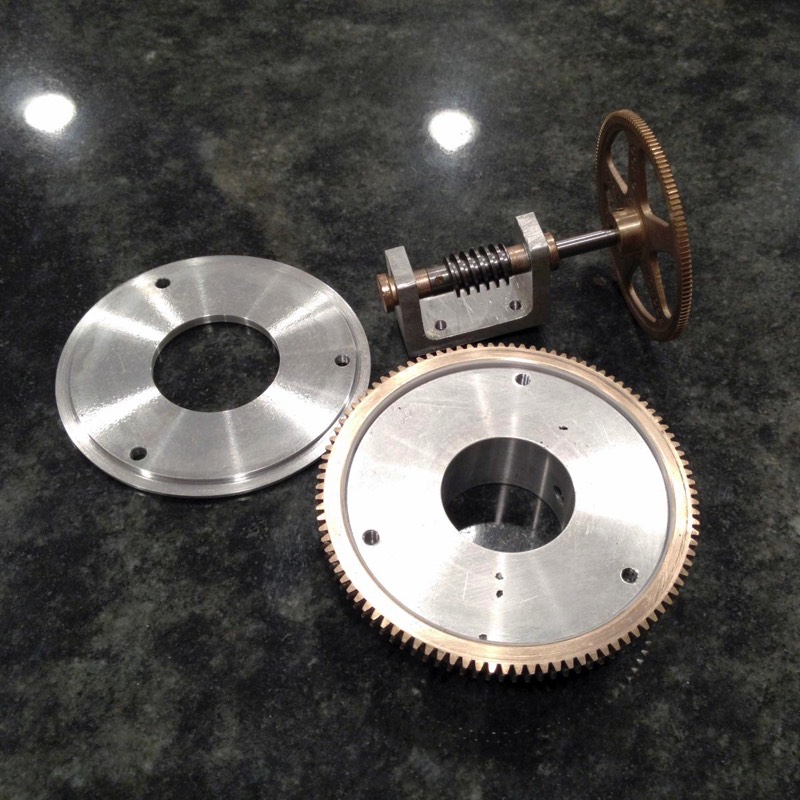
Fortunately, the gears and electronics were in good condition. I soaked the RA ring gear in a solution of Simple Green to loosen the hardened grease. Once dismantled, they were easily cleaned and reassembled. All fasting bolts, nuts, etc. were replaced with stainless steel to prevent corrosion down the road. I also, dismantled the worm drive to clean out the old grease since it was very hard to turn. The bushings that hold the worm gear axis are sintered bronze so cleaned them with solvent and soaked them in CLP gun oil. Once reassembled, the worm gear would spin like it was mounted on precision bearings!
A Cave restoration from an Estate find.
By Norman Tajudin
On a moment's notice, I joined a friend to attend an estate sale in Newport Beach, California. There was a telescope listed for sale for $500 in the advertisement. My thoughts were that if it was halfway decent, I could flip it on Astromart and not think twice.
Upon arriving at the estate sale and inspecting the telescope however, I thought that it was a tired, rusted out piece of junk. It had a brand name called “Cave Astrola” that quite frankly, I had never heard of. Nevertheless, I decided to search “Cave Astrola” on my phone and that's when I came across the Cave-astrola.com website. After reading a bit I realized I might have a gem on my hands. After negotiating with the estate sale folks, I walked out with a 1976 Cave Astrola 10" f/5 telescope and mount for just $300!
When I brought the package home, I started the process of reading through the website and searching for reviews on the optics. I also cleaned the mirrors to check it out while I considered my options of flipping it or keeping and restoring it. Fortunately, that night, there was no moon and Jupiter was in the sky. Upon properly adjusting the secondary and collimating the optics, I took a glance at Jupiter. The telescope showed a clear delineation of Jupiter's bands and a wonderful view of the great red spot. The view rivaled my much more expensive Astrograph. That is when I was hooked. My path was clear. I was going to restore the Cave Astrola and keep it for myself!
My first step was to research the different restoration efforts on the Cave Astrola site and the CloudyNights (CN) site under “Classic Telescopes”. I also started a restoration thread on CN to not only document my restoration but also to get guidance from experts like Tom Terleski, Jon Miles, Steve Gorton, Tim Parker, and many others. All of my prior astronomy equipment is 2005 and newer so I was in the dark with restoring a classic telescope like this. I didn't want to waste time going down dead-end paths or doing irreversible damage so I knew their guidance during my restoration was invaluable.
Teardown
The teardown process in and of itself was challenging considering the years of rust that had accumulated on the mount. Also, all of the original grease had hardened into an epoxy like substance! Many describe this as a “varnish” that many of the old Chinese mounts suffered from.
Declination Axis
I started with the declination shaft. I used a lot of liquid wrench, lots of colorful comments and eventually lots of patience to free the locking collars, counterweight, and setting circle. Once this was done, the rest of the declination, including the OTA saddle was easily removed. I used heat and a slide hammer to remove the declination axis bearings. Unfortunately, I may have used a little too much effort in removing the bearings and I had to replace both bearings. The original were Torrington branded bearings. Fortunately I found a match on Amazon that were made by Koyo (Koyo HJ-243320 Needle Roller Bearing).
Right Ascension Axis
Next, I started the dismantling process for the RA axis. Once again, liquid wrench and heat played a key role in facilitating the removal of the locking collars and setting circle. Once removed, I was able to take apart the drive assembly (motor, worm gears, mount plate, etc.). Next, I used a rubber mallet to "ease" the aluminum trim ring, allowing access to the upper bearing setscrews. I used Jon's tip in creating a modified Allen wrench to loosen both Sealmaster ER-24 bearing setscrews (two on each side). Despite loosening the setscrews, the RA axis was stuck. That's where my 5 lb. dead blow hammer came in handy! One of the original bearings were rough and needed replacement. This particular bearing was not a Sealmaster, so I procured an actual Sealmaster bearing from Amazon to match the other original bearing. The bearings are very large and are rated at several thousands RPM, but of course, only need to turn one revolution per day!
Pier and OTA
Once the RA axis was dismantled, I could focus on the pier and OTA. Both were straightforward. With the OTA, the aluminum trim rings on my version were pressed on so it only required a little elbow grease to slide them off without damaging the OTA and trim rings.
Painted Parts
Not wanting to use a ton of paint stripper and sand paper, I picked up a "blasting booth" from Harbor Freight to bead blast the painted parts. That was well worth the $100 price as it made easy work of the paint stripping process. Once stripped, I primed all of the parts with etching primer and then, as closely as possible, matched the original colors of the mount and saddle. I didn't clean up the original parts as I wanted my mount to look like it did when it came out of the factory, rough castings and filing marks and all.
OTA
With the OTA, I sanded the interior and painted it flat black. I fine sanded, polished, and waxed the exterior of the OTA to remove scratches and marks received in the prior owner's garage. While working on the OTA, I sent off the mirrors to L&L Optical in Santa Ana, California to be aluminized. The only modification I made to the OTA was the addition of a GSO Linear Bearing 2-spead focuser that would accept my 2" eyepieces and photography equipment. Fortunately, my OTA had two primary mount positions, allowing me to mount my mirror closer to the secondary to facilitate focusing with both my eyepieces and photography equipment.
Axes and Counterweight
Both axes were heavily rusted. Between Naval Jelly and a ton of varying grits of sand paper, I was able to bring back the “like stainless” shine buried underneath the rust. It's not perfect but it looks much better than before! I bead blasted the counterweight, primed it with etching primer, and painted it with satin black paint. I did the same for the locking collars.
Clock Drive
Fortunately, the gears and electronics were in good condition. I soaked the RA ring gear in a solution of Simple Green to loosen the hardened grease. Once dismantled, they were easily cleaned and reassembled. All fasting bolts, nuts, etc. were replaced with stainless steel to prevent corrosion down the road. I also, dismantled the worm drive to clean out the old grease since it was very hard to turn. The bushings that hold the worm gear axis are sintered bronze so cleaned them with solvent and soaked them in CLP gun oil. Once reassembled, the worm gear would spin like it was mounted on precision bearings!


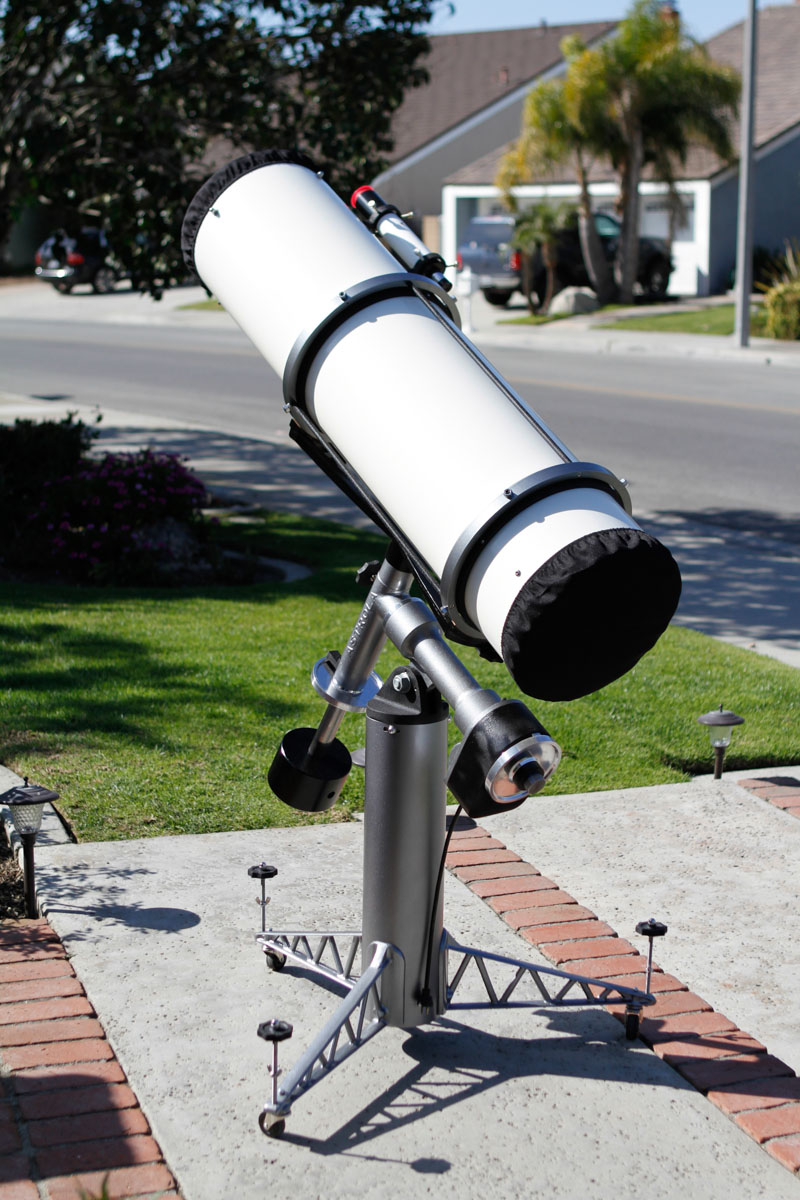
First Light
Once my Cave Astrola was reassembled, I was itching for a chance to use it. I picked up a Hotech laser collimator, adjusted the Secondary, and collimated both mirrors and was ready to go. Fortunately, a few nights later, we had a clear night here in Huntington Beach, California, and I was able to wheel out my new telescope! The laser collimation was spot on so I didn't have to fiddle around in the dark with a star alignment. I had some quality time viewing the Great Orion Nebula before the Moon popped above the horizon. Also, I was able to view Jupiter, and then the Moon once it got higher in the sky. I have never seen as much detail in Orion as I did with my new Cave. I could even see some hints of color in the nebulosity, something impossible with my 8" SCT and 80mm refractor at my sea-level viewing location. When panning to Jupiter, I was blown away at the detail I was able to resolve on the big gas giant. I could see Europa transiting Jupiter and it's shadow. Amazing! The moon was also breathtaking once I put on an ND filter as I almost blinded myself when I first positioned the scope!
My next project will be to build a Losmandy type rail for my Cave's rotating rings. Anthony from ADM is helping me out with the radius blocks that I will need to match the diameter of the rotating rings. I'm still pretty new to using a non-goto scope, so I want to see what's out there when I put it on my CGE mount. I'm sure I'll be blown away like I was with Orion, Jupiter, and the Moon.
"Norm has done an absolute brilliant job on this restoration! A truly wonderful find and great motivation to make it a work of art. Enjoy it my friend for as long as you own it."
Tom T