
Barry Crist Cave Miniature!
While searching the internet for the many articles and tidbits of information about Thomas Cave Jr., I ran across a gentleman who intrigued me with a talent I knew little about. Barry Crist has been building telescope miniatures for many years. He started a small business years ago and showed up at telescope shows and star parties with miniatures he made that were quite remarkable. Barry has also worked for observatories and their gift shops and has built models of some of the larger more famous telescopes from yesterday gone by.
I tried to reach Mr. Crist and found out he had retired from the “business” and had also moved from his home in Pennsylvania. The researcher I am, I tracked down Barry in his new home in Arizona and after a few back and forth emails, he agreed to do one more model for me. I had just purchased a Cave chrome deluxe from a gentleman in New York, and this became the candidate of choice. But mine has not been restored yet and modeling a less than perfect telescope would just not do. I called my friend Jon Miles who had just completed a full restoration on his chrome version (the first restoration on this website) and it became the “model” scope for this project. With a little prodding from me, I convinced Jon that he also would need to have one of these models built for him especially after agreeing to be the pattern for the project. Jon agreed and Barry was commissioned to start the project of building two identical models of the Cave classic.
I began by sending many pictures to Barry of Jon’s 10” scope. Barry some years ago had model a 10” cave and had some of the drawings from back then to help him get started. His work I believe took about 3 months. I ask Barry to take lots of pictures for this article I planned on putting on the website, and within days Barry was sending me images of molds and parts, tubes and focusers and many of the components that make up a Cave telescope, but in miniature! What follows is his account of the creative process of building these two models.
Turk
Barry Crist
Born: Nov. 9, 1944
Born in Newport, PA
Interest in Astronomy:
I grew up during the beginning of the Space Age. I became intensely interested in the U.S. rocket program. I followed the development and launching of the early ICMB’s and space vehicles. I even experimented with some homemade rockets.
My interest in astronomy grew out of that interest in space travel. Since one of the goals of the space program was to go to the Moon, I became interested in the Moon as a new world. This led to me making casual observations of the Moon with my Dad’s 3x field glasses from my front porch. While doing that I noticed that there were many other objects in the sky as well. Our family calendar hanging in the kitchen had the phases of the Moon, an ephemeris for the planets, and fishing guides to tell us when the fishing would be good. I didn’t care about the fish.
An ad in a comic book showed a kit for a high power telescope for $3.50. After scraping the money together I sent for the kit. It had a 50 mm objective lens of 80 inch focal length and two lenses to make an eyepiece. A flimsy cardboard tube and a converted floor lamp stand resulted in the breaking of the objective lens. So much for my first telescope.
My parents came to my rescue with a 3 inch Moonscope. That started my career in amateur astronomy. I found out about Sky and Telescope Magazine and that introduced me to the wide world of telescopes, star charts, astronomy information and the whole array of commercial vendors. I spent my days drooling over the Unitron, Cave, and Edmund catalogs and my nights stargazing. My next step was a homebuilt 4 inch Newtonian reflector. I got a $5 mirror from Criterion Mfg. and liberated the diagonal from the 3 inch Moonscope. A piece of 5 inch stove pipe and a wooden mount plus a Chase & Sanborn coffee can lid for a mirror mount and a homemade focuser completed the rig.
In my senior year of high school I tried to grind a 6 inch mirror. The project didn’t work out well. I was working alone with no outside help available and couldn’t complete it. I sent the mirror and tool to A. R. Griswold who advertised in S&T. He finished the mirror. But by then graduation came and I lost most of my interest in stargazing. I bummed around a year or so and then joined the Navy in 1964. My stargazing career was on hold for quite a while.
That interest didn’t come back until around 1968 after the Navy and after I got married to the love of my life, Donna. I revived the 6 inch project. I bought the parts from Edmund Scientific and assembled the telescope. Donna bought me an Edmund equatorial mount for Christmas to complete the scope.
After that, astronomy came and went in my interest until the Great Dobsonian Revolution came around in the late 70’s and early 80’s. I built a 12.5 inch dob. That scope went through several rebuilds over the years and ended up as a truss tube dob after being in a observatory dome on an equatorial mount for a while.
Now my astronomy interest centers on a 10 inch Meade Lightbridge dob in a roll-off roof observatory.
I still pursue my passion of deep sky observing. I’m a star-hopper and visual observer. However, I have begun a photographic solar patrol. That sounds importantly scientific but it’s just a fun thing for me.
My miniature telescope making career:
Naturally, my interest in astronomy led to attending star parties around the eastern U. S. I lived in Halifax, PA. That’s in central PA. I would go to star parties with a friend and told him I always wanted an antique brass refractor. He gave me a joke gift of a telescope model made from a piece of copper tubing and a wooden tripod. So, not to be outdone, I went to the hobby store and got some brass tubing and made him a brass refractor model. It wasn’t the best but it intrigued me. That was in 1989. As a boy in school I had made two models of telescope—a Unitron 4 inch and a Newtonian reflector. That was way back in about 1960.
That model making effort lay dormant until this brass refractor project came to about. After that I started making brass models of telescopes for myself and other astronomy friends.
After going to Stellafane in 1985 and thereafter, I began thinking that maybe someone else might like models of telescopes. I made a few and took them to Stellafane. They sold as quick as I put them on the table. The next year I took some more models but, alas, I ran afoul of the Stellafane vendor ban. I was not allowed to sell them there. So, knowing I had a product that sells, I went into business. I set up a shop in the garage, printed some brochures and began a campaign of making models and taking them to star parties as a vendor. Sales were good. I bought more equipment and expanded my line of models.
In January of 2000 I retired from my job at the Mechanicsburg Naval Depot. I went full time into the model telescope business. I built a large shop in the back yard—replacing the observatory building that was there. The model making equipment was moved from the garage to the new shop. Retirement allowed me to travel more and my wife and I began making trips to the major star party events across the U.S. The first year I went to the Northeast Astronomy Forum, I nearly sold out my inventory. We also attended the Winter Star Party, the Riverside Telescope Makers Convention (RTMC) and as many other star parties as we could.
Then in 2010 we attended the RTMC and stopped on the way home at Kingman, AZ. We had been in Kingman many times in traveling to RTMC and liked the area. We contacted a realtor and began looking for a house. After looking for a while we made the decision to go back to Pennsylvania and sell our house there. It took thirteen days to sell that house. We packed our belongings and headed back to Kingman. There in a week’s time we were led to the perfect house twenty miles out of Kingman on old Route 66. Open sky, great desert view, all the amenities we wanted made this the perfect place for us.
This move was the official end to my miniature telescope making business, b. crist miniatures.
The Miniature Telescope Models produced by b. crist miniatures:
(These were made in batch quantity—about 20 or 30 at a time--and kept in stock)
6 Inch Alvan Clark Refractor
Newtonian Reflector (resembles Edmund)
18 Inch Dobsonian Reflector
18 Inch Dob Reflector Kit
Televue TV-85 (appeared in Televue “smorgasbord” ad in S&T w/ the AC 6 Inch and the 18” Dob)
4.5 Inch Brashear Refractor
6 inch Criterion Reflector
10 inch Cave Astrola
Alvan Clark Comet Seeker
Schmidt-Cassegrain Reflector
Classic Dob (solid tube dob)
Gregorian Reflector
200 Inch Palomar Hale Telescope (made for gift shop at Palomar)
100 Inch Mt. Wilson Telescope (made for Mt. Wilson Institute)
60 Inch Mt. Wilson Telescope (made for Mt. Wilson Institute)
Set of Rosewood Models (Refractor, SCT, Newtonian, Dob)
These are the main inventory models.
There were others including several working miniature models and special orders over the years.
Components of 100 Inch Hooker, Mt. Wilson Telescope Models
Made for the Mt. Wilson Institute in 2011
1/60th scale models of the Mt. Wilson 60 Inch telescope.
Made for the Mt. Wilson Institute. Made in 2011
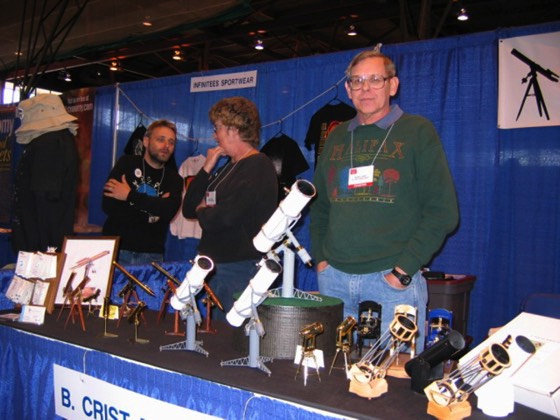
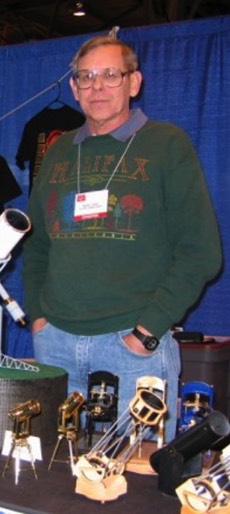
Vendor booth at the North East Astronomy Forum
Left to right: Dirk of Infinitees, Donna Crist and Barry Crist
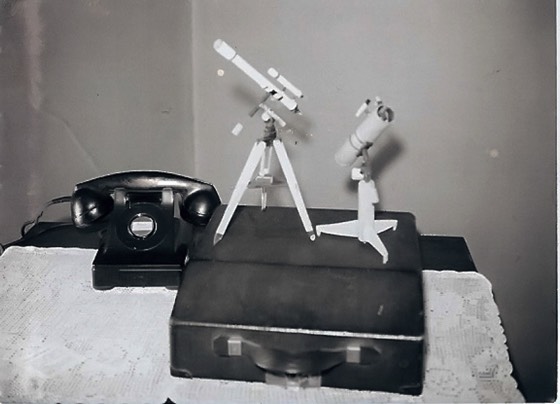
Telescope models made by Barry Crist in 1960. Left is a 4 Inch Unitron and right is a generic Newtonian Reflector. Construction materials: wood and cardboard
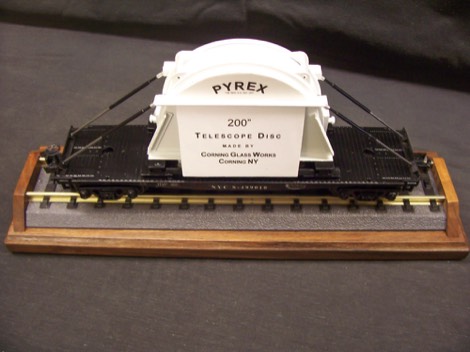
Model of the 200 Inch Hale Telescope mirror shipping crate on a flatbed railcar “O” gauge scale. Made in 2010

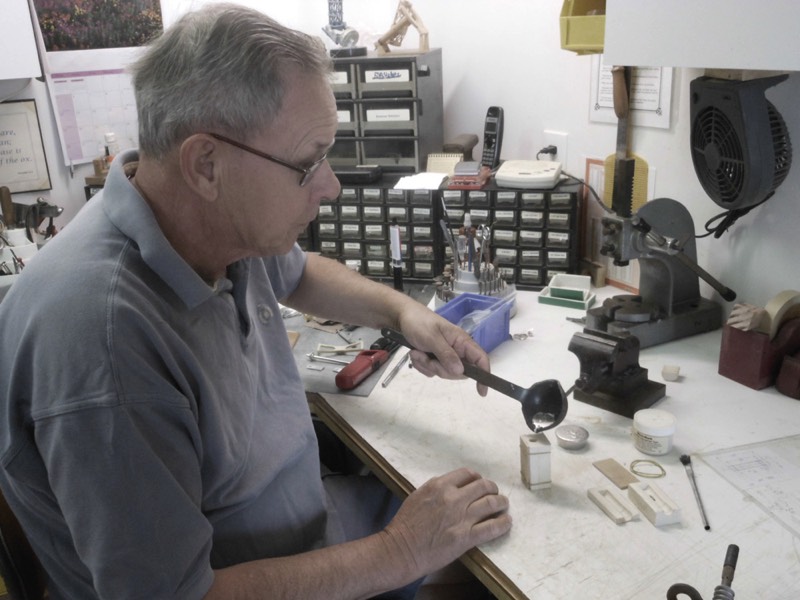
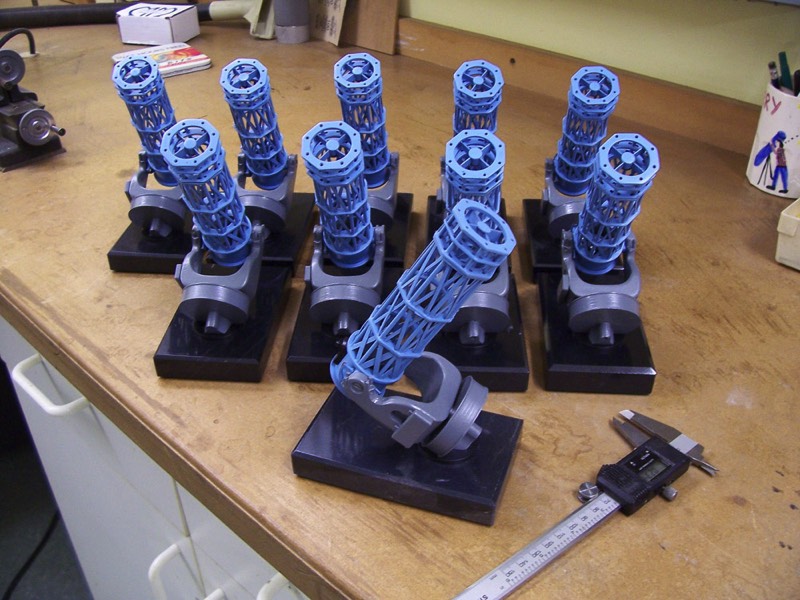
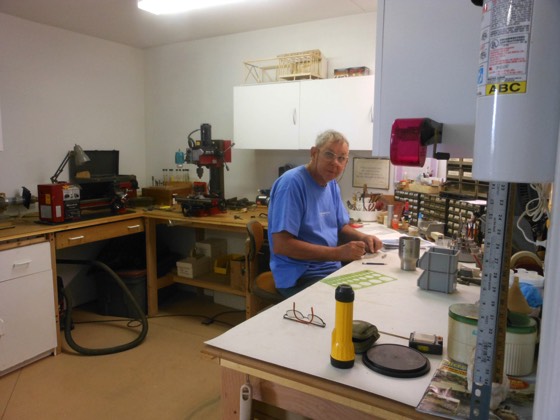
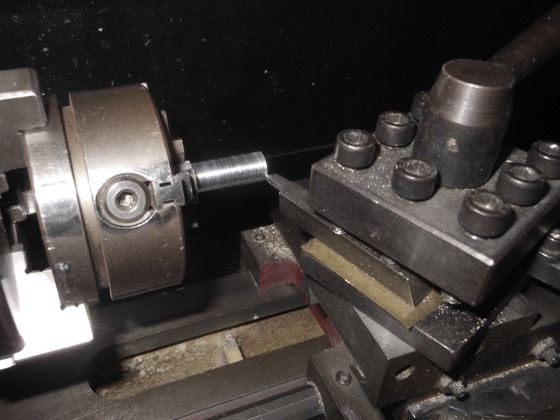
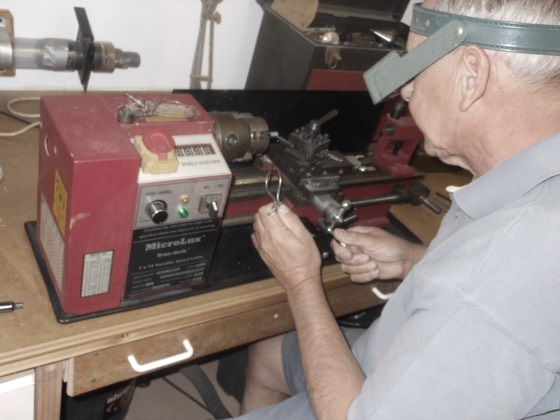
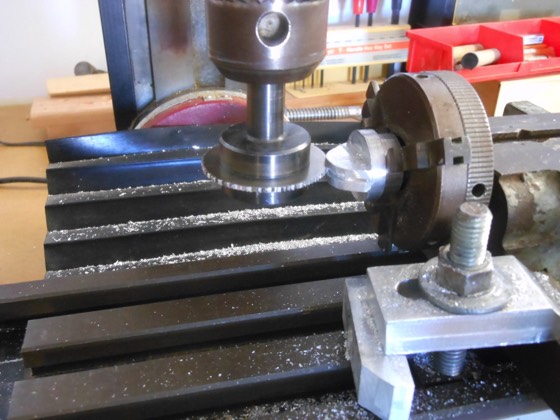
Lathe work with 2x visor – small parts require close attention
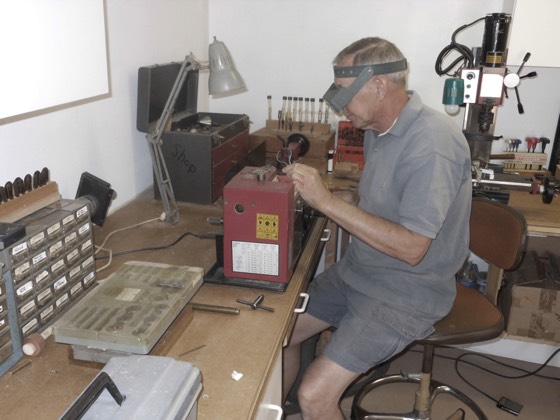
The Build
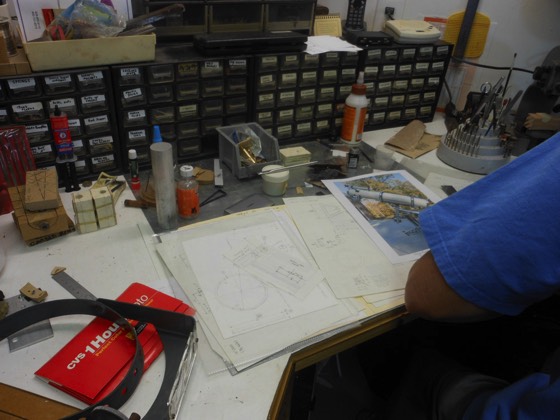
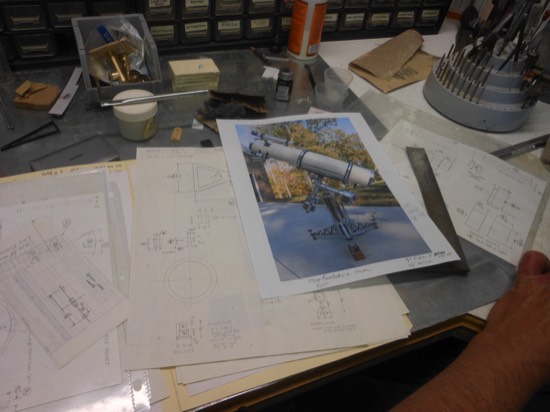
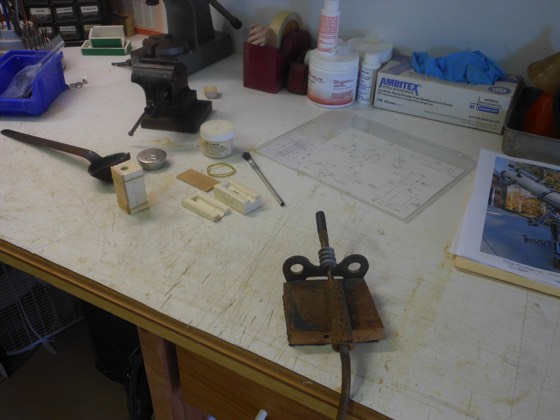
Workbench in B. Crist shop showing initial design work of the 10 Inch Cave model.
Close up of workbench during 10 Inch Cave model design showing the primary photo used of Jon Miles’ 10” Cave which was the original pattern for the model.
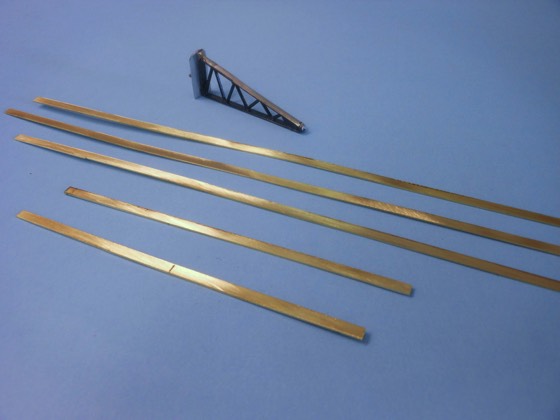
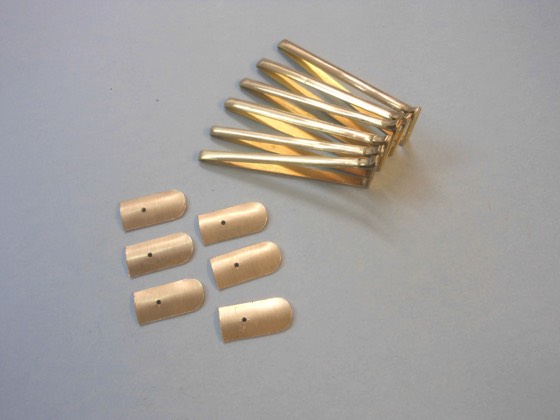
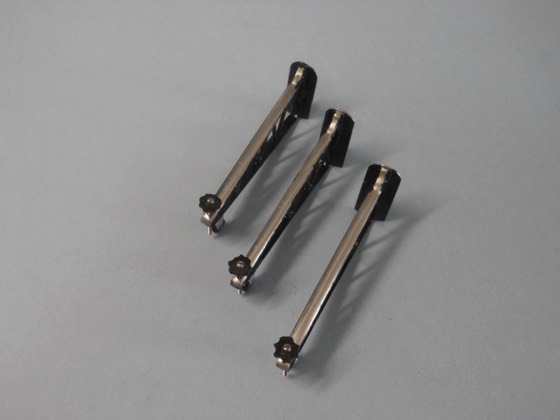
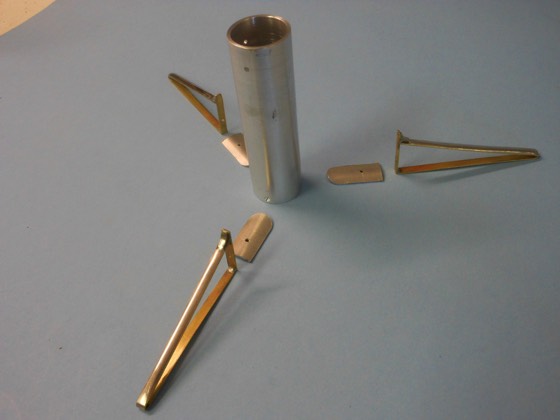
A completed mounting pier leg and the brass raw material from which the legs are made.
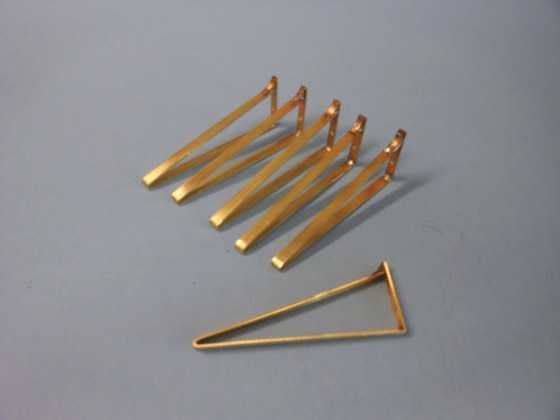
Six assembled mounting pier leg frames before adding the interior braces and mounting plates.
Close up of three leg frames
The leg frames with their mounting plates
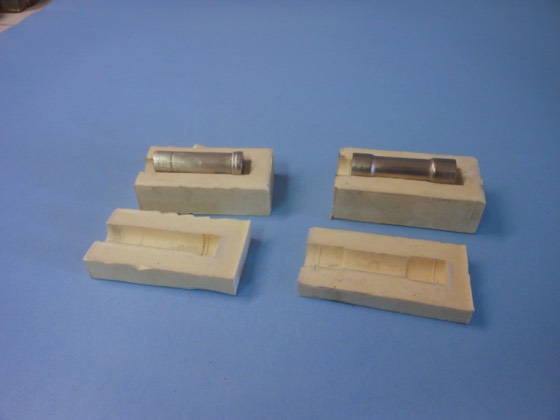
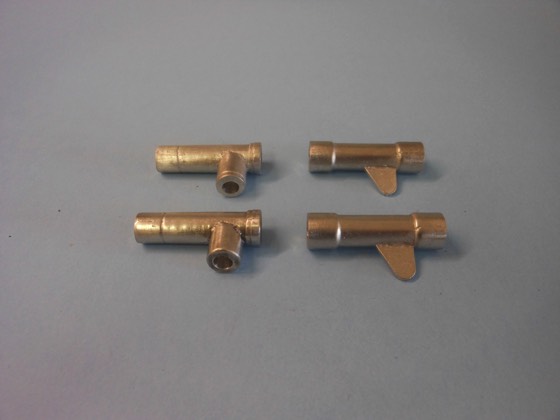
Preparation for pouring the castings for the Right Ascension Housings. The housings are cast with a low temperature casting metal in an RTV rubber mold.
The RTV rubber molds for the Right Ascension and Declination housings. The RA casting shown is the raw casting before machining (right). The Dec. casting is a completed, machined casting (left).
Working with the Declination Housing castings. Essential material on hand can be seen on the right—fresh brewed coffee.
Pouring the metal for a Declination Housing. The low temperature casting metal melts at 280 degrees F and contains no lead.
Two sets of mount housings after machining and before final finishing.
Barry hard at work on the mounting design.
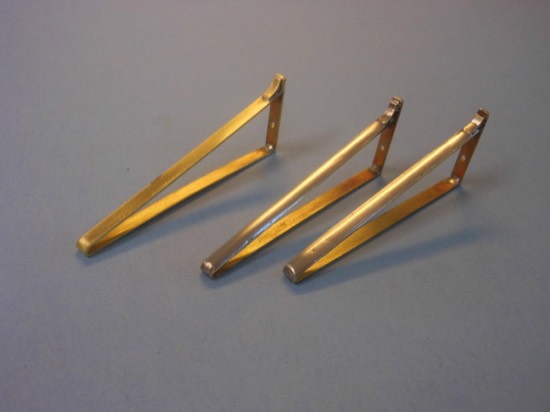
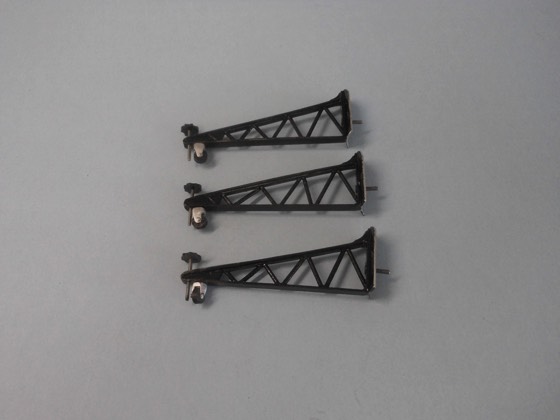
Three completed mounting pier legs complete with cross braces, mounting plates, wheels and leveling screws.
Legs are painted and finished according to the Jon Miles’ photo.
Another view of the three completed legs showing the polished top. Although the construction material is mainly brass, the tops are finished with a plating of the low temperature metal to give the polished aluminum look.
Machining the aluminum stock to make setting circles.
Another view of the setting circle machining.
Lathe work with 2x visor – small parts require close attention
Milling the slot on the pier head to accept the R.A. Housing and the Latitude Adjust bolt.
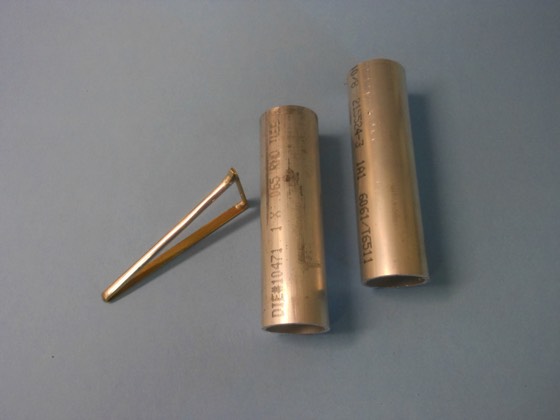
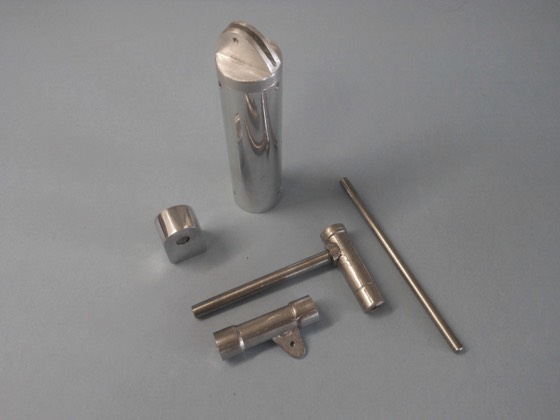
The raw aluminum tubing cut to length to make the Piers.
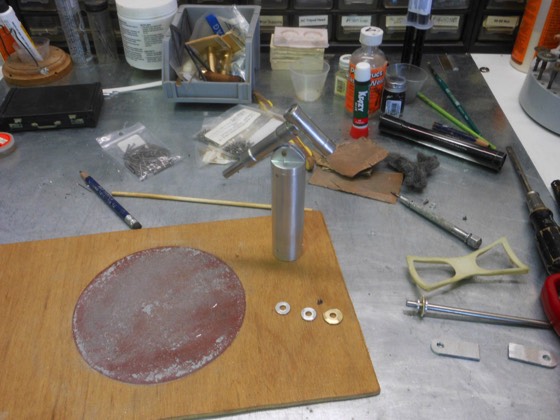
A view of the cluttered bench during pre-fitting mounting parts.
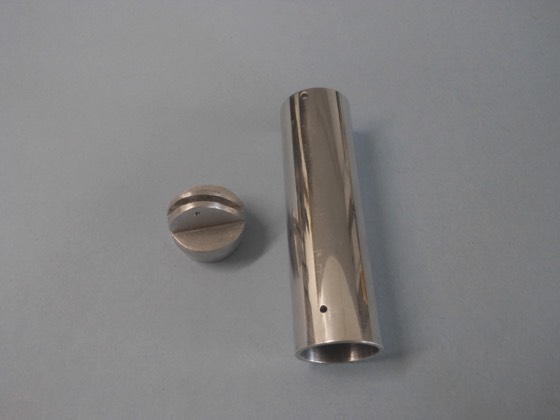
A completed Pier after machining, drilling and polishing along with a completed Pier Head.
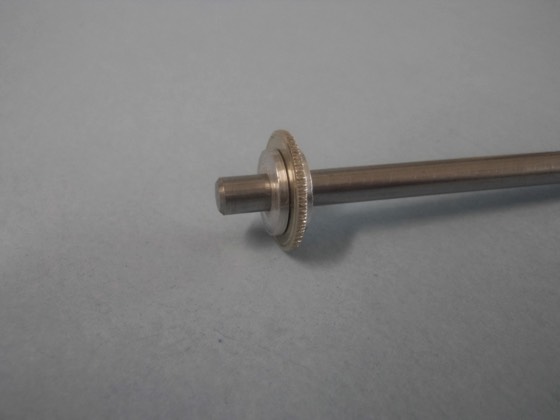
Stainless steel Declination Shaft with Dec. Drive Gear
Pier tube with leg frames and mounting plates
Mount and Pier parts including: Pier, Pier Head, Dec. and R.A. Housings, R.A. and Dec. Shafts and the R.A. Drive unit. Shafts are stainless steel.
Cradle casting. This is the raw casting before machining and finishing.
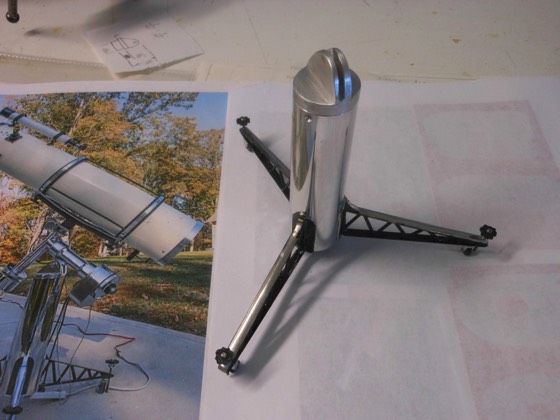
Assembled Pier next to the Jon Miles photo of the real 10 Inch Cave
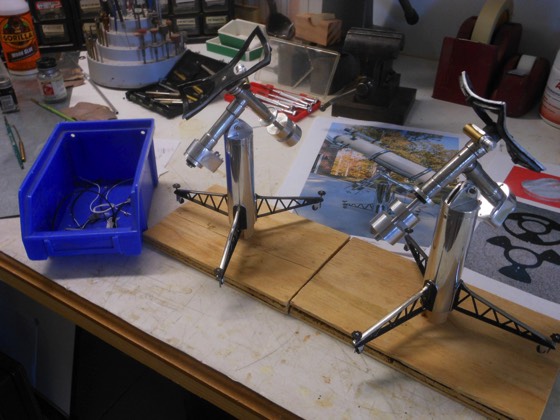
The two assembled mounts on their working stands. The stands allow the mounts to be worked upon without putting stress on the delicate leg parts.
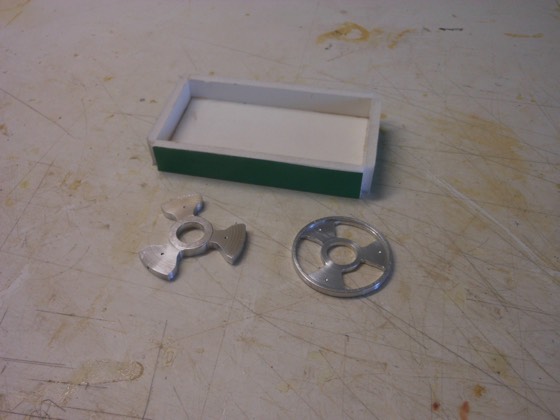
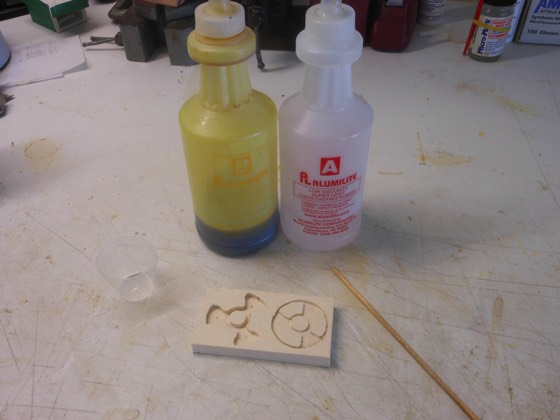
The mirror mount patterns made from aluminum. These patterns are machined with all the detail of the finished part and are used to make an RTV rubber mold used in casting the finished parts. The mold box is in the background.
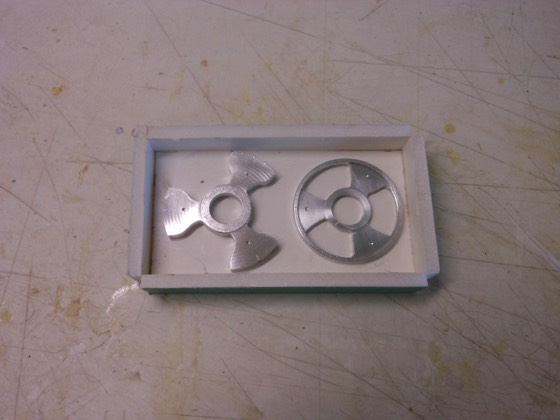
This shows the Mirror Mount patterns in the mold box ready for the liquid RTV to be poured.
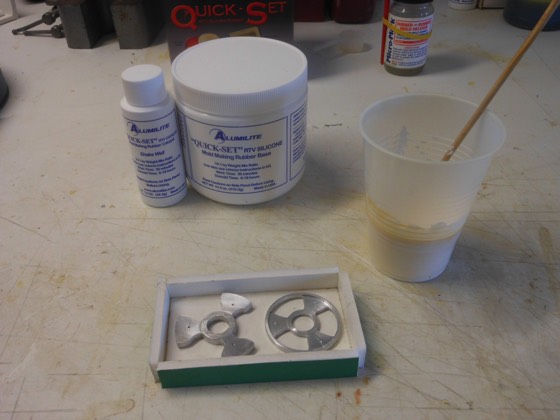
This is the liquid RTV in the plastic cup prior to pouring into the mold box. In the background are the RTV 2-part components.
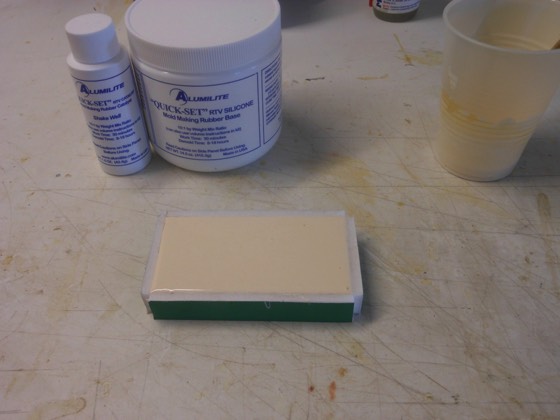
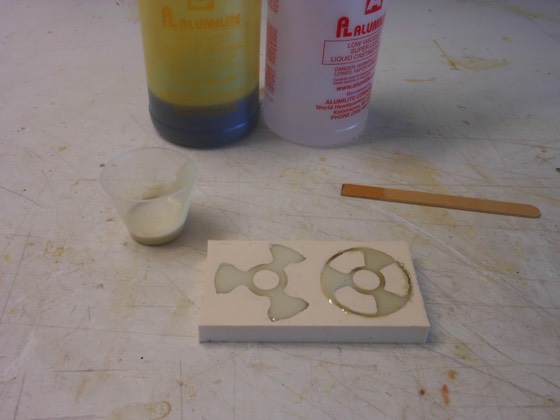
After pouring the liquid RTV in to the mold box. This is left to cure for at least 4 hours. After which the mold box can be removed and the patterns removed from the new rubber mold.
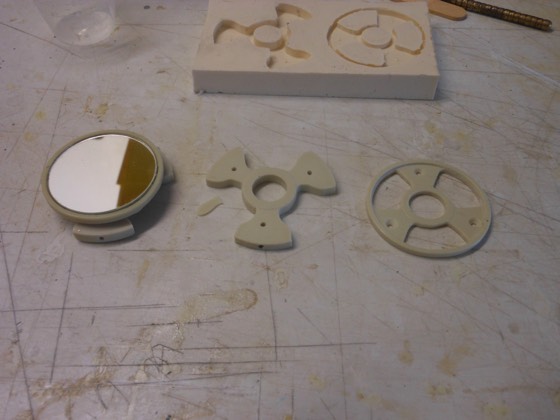
Here is the new Mirror Mount rubber mold. In the background are the bottles of the 2-part urethane casting material.
These will be mixed 1:1 to make the casting resin which is poured into the rubber mold. The casting resin hardens in a few minutes and the new parts can be popped out of the mold.
Showing the newly poured casting resin as it hardens in the mold.
These are the newly made castings after being cleaned and drilled. An assembled Mirrour mount is at the left.
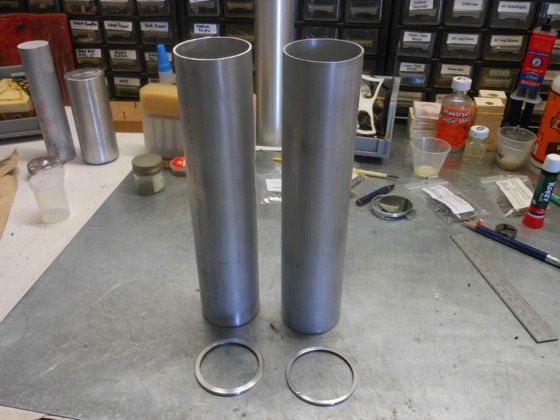
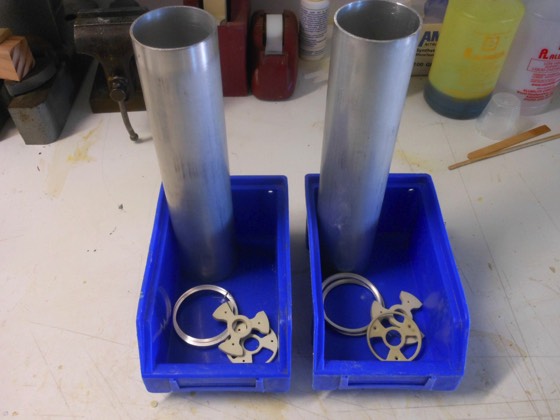
These are the Main Tubes cut to length before drilling and machining the mounting holes.
Two aluminum end rings are show in the foreground.
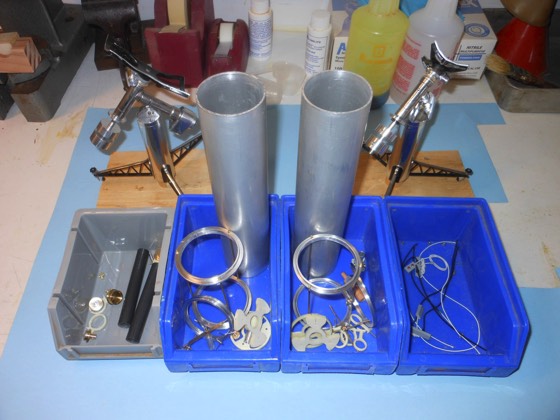
The two Main Tubes along with some of the other parts being stored in tote boxes as the process procedes.
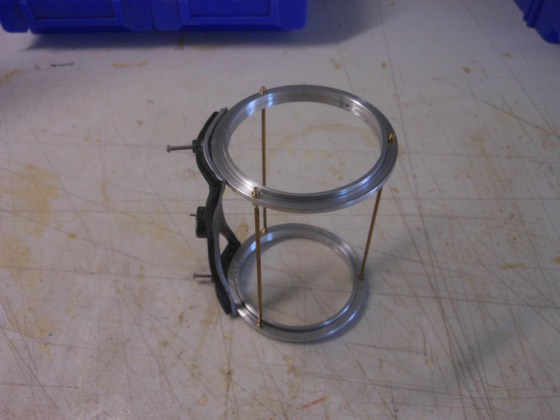
Here is a completed Rotating Ring Assembly with a finished Cradle attached. The rings are machined from aluminum stock and the rods connecting the two rings are brass and will be painted later.
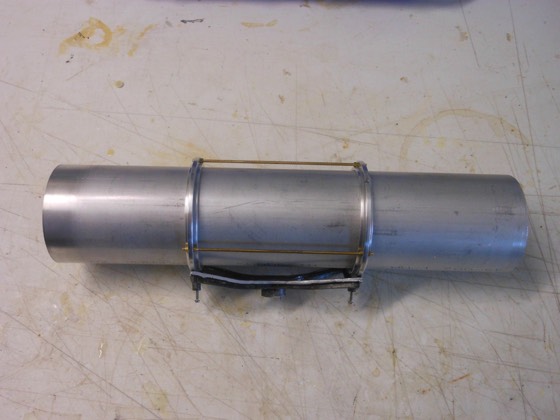
This a view of a preliminary fitting of a Main Tube into the Rotating Ring Assy. for the purpose of locating the mounting holes for the Rotating Ring Assy. on the Main Tube.
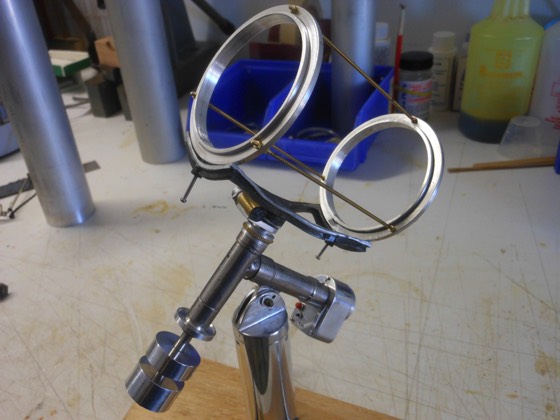
Getting closer to the finish! Here is a preliminary assembly of the Cradle and the Rotating Ring Assembly to the Mounting.
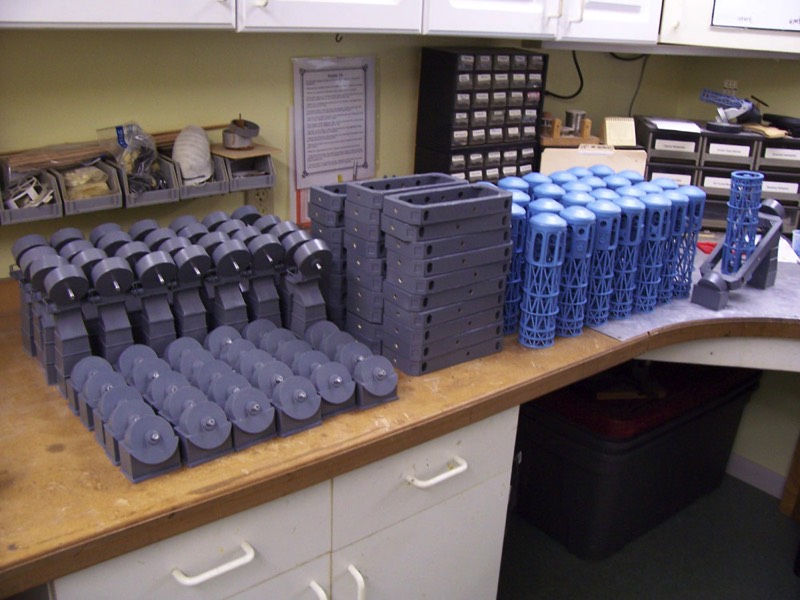
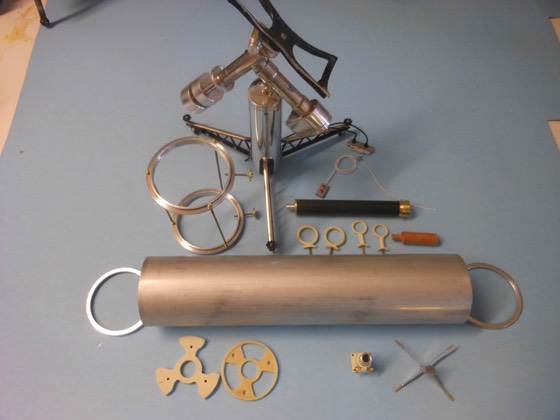
Here are all the mechanical parts for the telescope model. It can be seen that some of the parts are metal and others have been made by casting from the urethane resin. Casting allows the making of many parts that are exactly alike without the need for tedious repetitive machining.
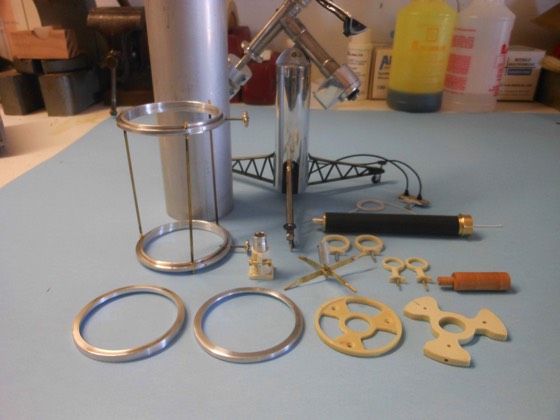
Another view of the various parts.
Here are the completed parts for the two models ready for final finishing and painting prior to assembly.
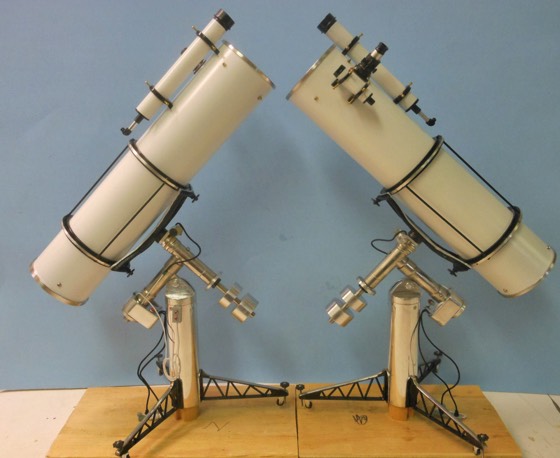
Here are the completed models resting on their working stands. At this point all parts are in place and the models are ready for packaging and shipping.
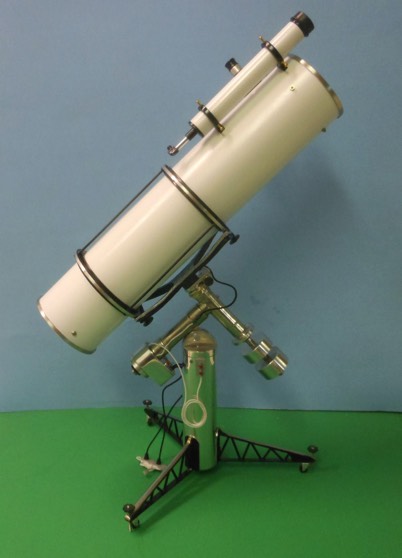
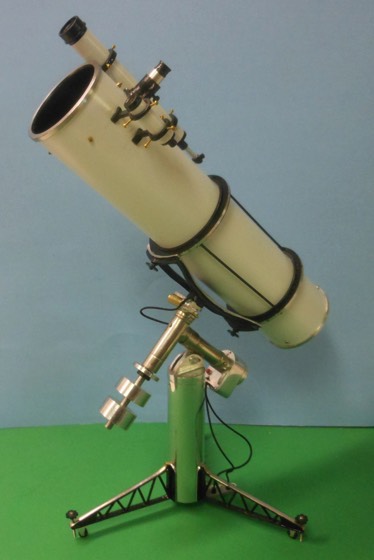
Here is a “east side” view of one of the completed models.
This the “west side” view of the same model.
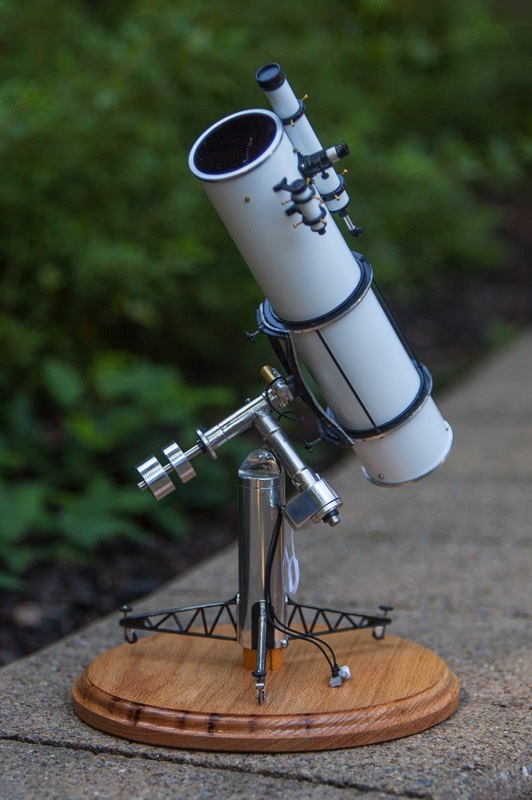
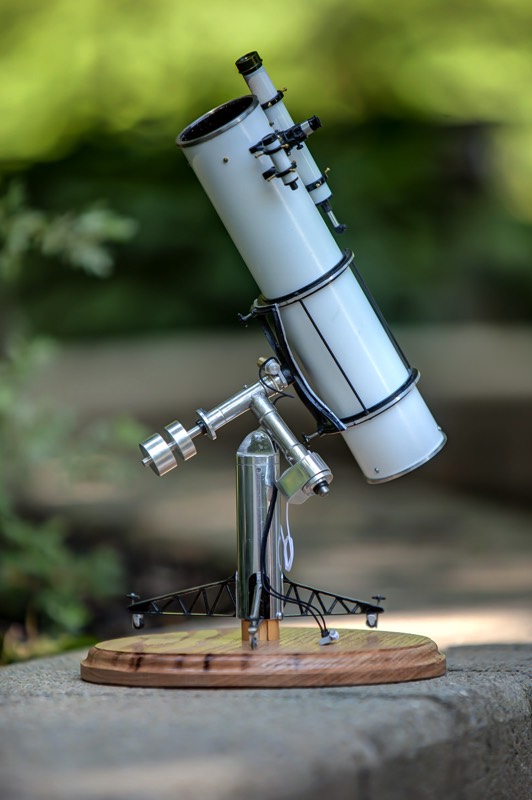
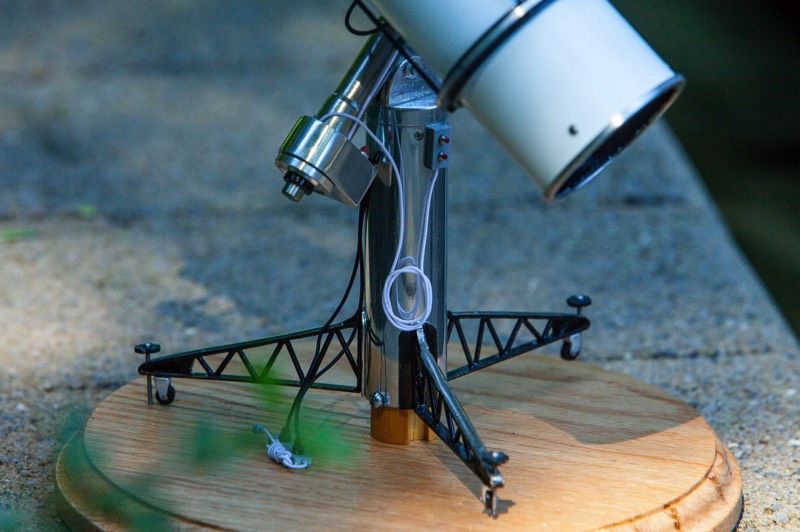
Tom Terleski’s model as it was received. It is mounted on an oak base that allows display without putting stress on the delicate leg parts. (viewed from the “southwest”)
Tom Terleski’s model also from the “southwest view”
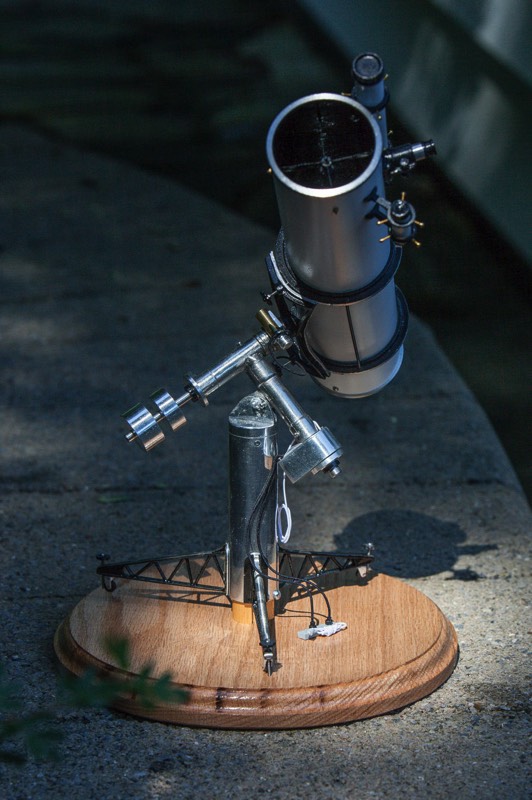
Tom Terleski’s model with an interesting shadow effect and showing the wiring for the electric drive units.
Another view from the “southeast” of Tom Terleski’s model showing more of the wiring for the drive units.
Pouring the metal for a Declination Housing. The low temperature casting metal melts at 280 degrees F and contains no lead.
Two sets of mount housings after machining and before final finishing.
Barry hard at work on the mounting design.
Three completed mounting pier legs complete with cross braces, mounting plates, wheels and leveling screws.
Legs are painted and finished according to the Jon Miles’ photo.
Another view of the three completed legs showing the polished top. Although the construction material is mainly brass, the tops are finished with a plating of the low temperature metal to give the polished aluminum look.
Machining the aluminum stock to make setting circles.
Another view of the setting circle machining.
Lathe work with 2x visor – small parts require close attention
Milling the slot on the pier head to accept the R.A. Housing and the Latitude Adjust bolt.
The raw aluminum tubing cut to length to make the Piers.
A view of the cluttered bench during pre-fitting mounting parts.
A completed Pier after machining, drilling and polishing along with a completed Pier Head.
Stainless steel Declination Shaft with Dec. Drive Gear
Pier tube with leg frames and mounting plates
Mount and Pier parts including: Pier, Pier Head, Dec. and R.A. Housings, R.A. and Dec. Shafts and the R.A. Drive unit. Shafts are stainless steel.
Cradle casting. This is the raw casting before machining and finishing.
Assembled Pier next to the Jon Miles photo of the real 10 Inch Cave
The two assembled mounts on their working stands. The stands allow the mounts to be worked upon without putting stress on the delicate leg parts.
The mirror mount patterns made from aluminum. These patterns are machined with all the detail of the finished part and are used to make an RTV rubber mold used in casting the finished parts. The mold box is in the background.
This shows the Mirror Mount patterns in the mold box ready for the liquid RTV to be poured.
This is the liquid RTV in the plastic cup prior to pouring into the mold box. In the background are the RTV 2-part components.
After pouring the liquid RTV in to the mold box. This is left to cure for at least 4 hours. After which the mold box can be removed and the patterns removed from the new rubber mold.
Here is the new Mirror Mount rubber mold. In the background are the bottles of the 2-part urethane casting material.
These will be mixed 1:1 to make the casting resin which is poured into the rubber mold. The casting resin hardens in a few minutes and the new parts can be popped out of the mold.
Showing the newly poured casting resin as it hardens in the mold.
These are the newly made castings after being cleaned and drilled. An assembled Mirrour mount is at the left.
These are the Main Tubes cut to length before drilling and machining the mounting holes.
Two aluminum end rings are show in the foreground.
The two Main Tubes along with some of the other parts being stored in tote boxes as the process procedes.
Here is a completed Rotating Ring Assembly with a finished Cradle attached. The rings are machined from aluminum stock and the rods connecting the two rings are brass and will be painted later.
This a view of a preliminary fitting of a Main Tube into the Rotating Ring Assy. for the purpose of locating the mounting holes for the Rotating Ring Assy. on the Main Tube.
Getting closer to the finish! Here is a preliminary assembly of the Cradle and the Rotating Ring Assembly to the Mounting.
Here are all the mechanical parts for the telescope model. It can be seen that some of the parts are metal and others have been made by casting from the urethane resin. Casting allows the making of many parts that are exactly alike without the need for tedious repetitive machining.
Another view of the various parts.
Here are the completed parts for the two models ready for final finishing and painting prior to assembly.
Here are the completed models resting on their working stands. At this point all parts are in place and the models are ready for packaging and shipping.
Here is a “east side” view of one of the completed models.
This the “west side” view of the same model.
Tom Terleski’s model as it was received. It is mounted on an oak base that allows display without putting stress on the delicate leg parts. (viewed from the “southwest”)
Tom Terleski’s model also from the “southwest view”
Tom Terleski’s model with an interesting shadow effect and showing the wiring for the electric drive units.
Another view from the “southeast” of Tom Terleski’s model showing more of the wiring for the drive units.


Well, there you have it. Two completed cave models. I want to thank Barry for coming out of retirement to build one of the most detailed models of his career. I know that Jon and I will cherish them for many years to come. I told Barry that my son is not exactly into astronomy or in collecting classic telescopes. I did tell Barry that my full size scopes will be given away when I'm gone, but his miniature will probably go to my son who will put it on a shelf and maybe just look at it once in a while and remember his Dad and the hobby he loved.
Thank you so much for that experience.
Turk
Thank you so much for that experience.
Turk